Search This Blog

Friday, October 31, 2014

French Toast for One


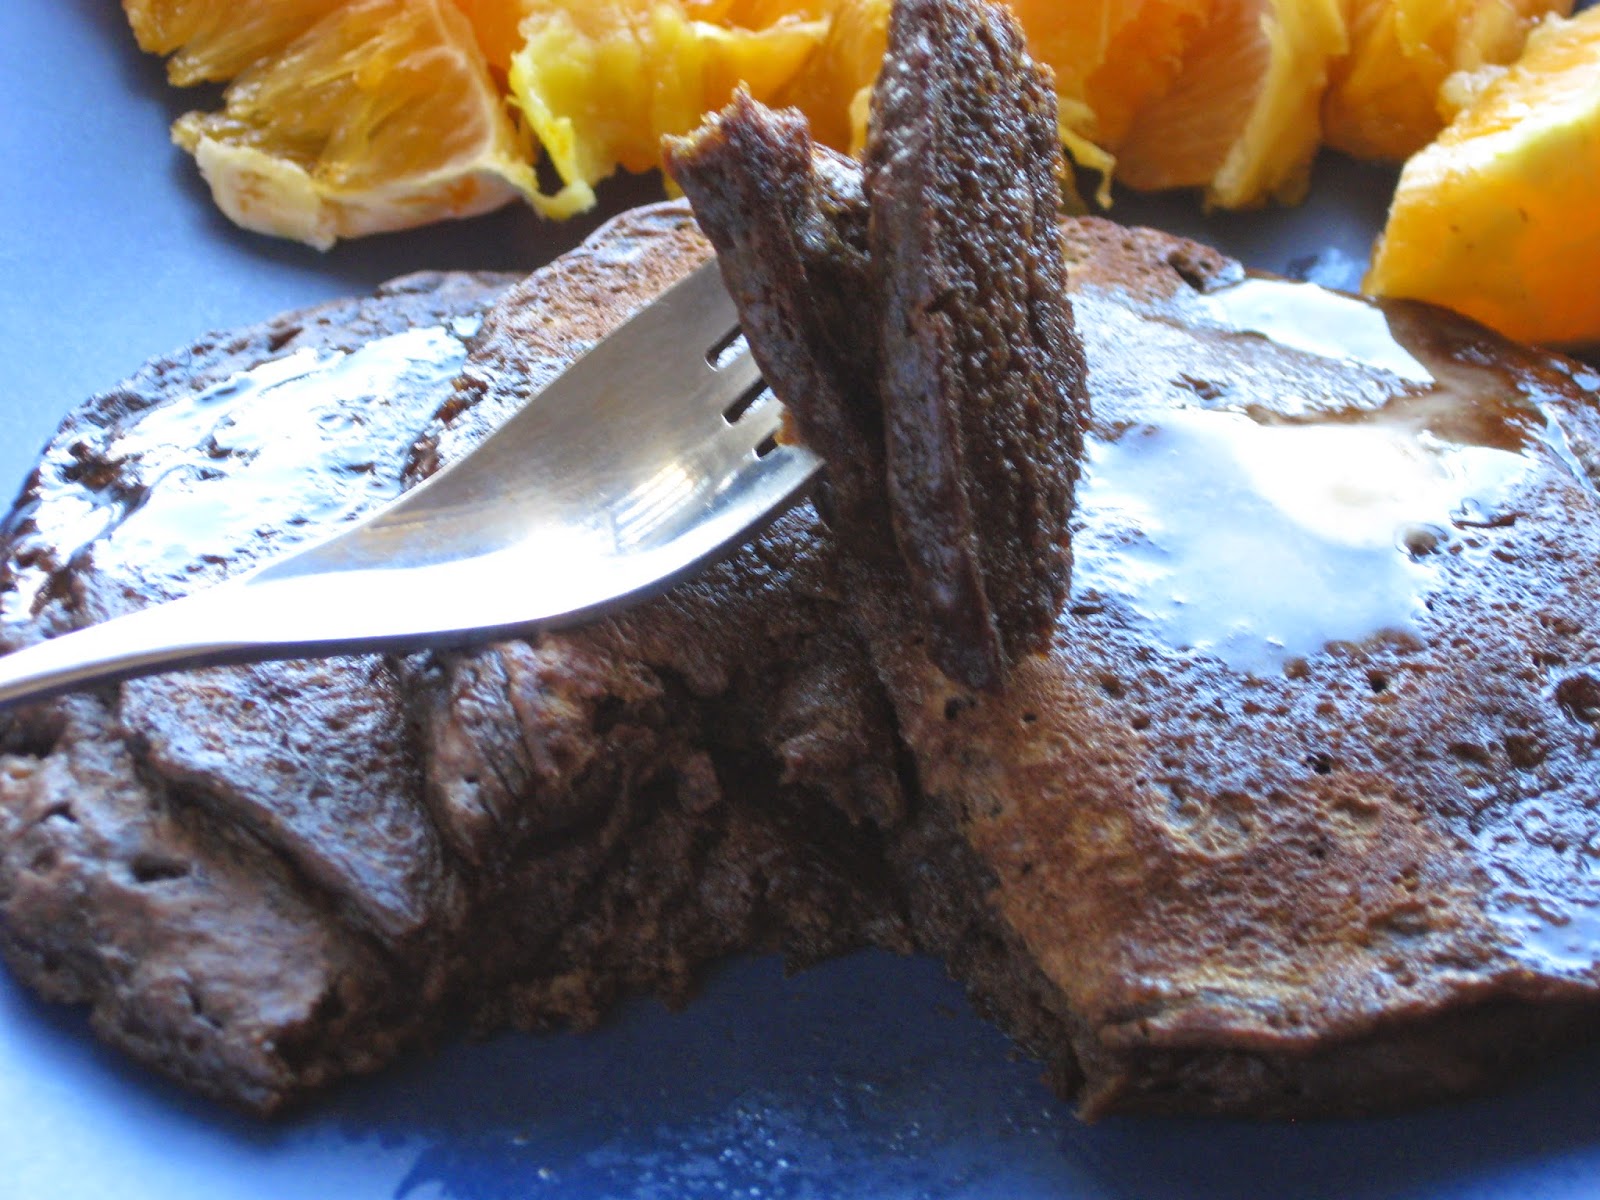
Just because you don’t eat eggs doesn’t mean you have to miss out on one of life’s greatest brunch pleasures: French Toast!

1/3 cup almond milk
1 dash vanilla extract
1 teaspoon agave nectar
2 teaspoons flour (millet, coconut, almond meal, all-purpose—your choice)
1 teaspoon nutritional yeast
2 shakes of cinnamon
A small pinch of ground nutmeg
An even smaller pinch of salt
2 slices slightly stale bread, sliced about ¾” thick
Oil for the pan (coconut, canola—your choice)
Powdered sugar, vegan butter, maple syrup, and fresh fruit for toppings

  1. Whisk the almond milk, vanilla, maple syrup, flour, nutritional yeast, cinnamon, nutmeg, and salt together in a flat bowl or a deep plate.
  2. Smoosh the bread into the mixture so that it’s thoroughly coated, flipping and turning it to make sure that it’s all wet. If it’s a bit soggy, that’s dandy.
  3. Heat the oil in a large skillet over medium-high heat. When the oil is hot, place the bread slices into it and cook for a few minutes per side, until golden brown.
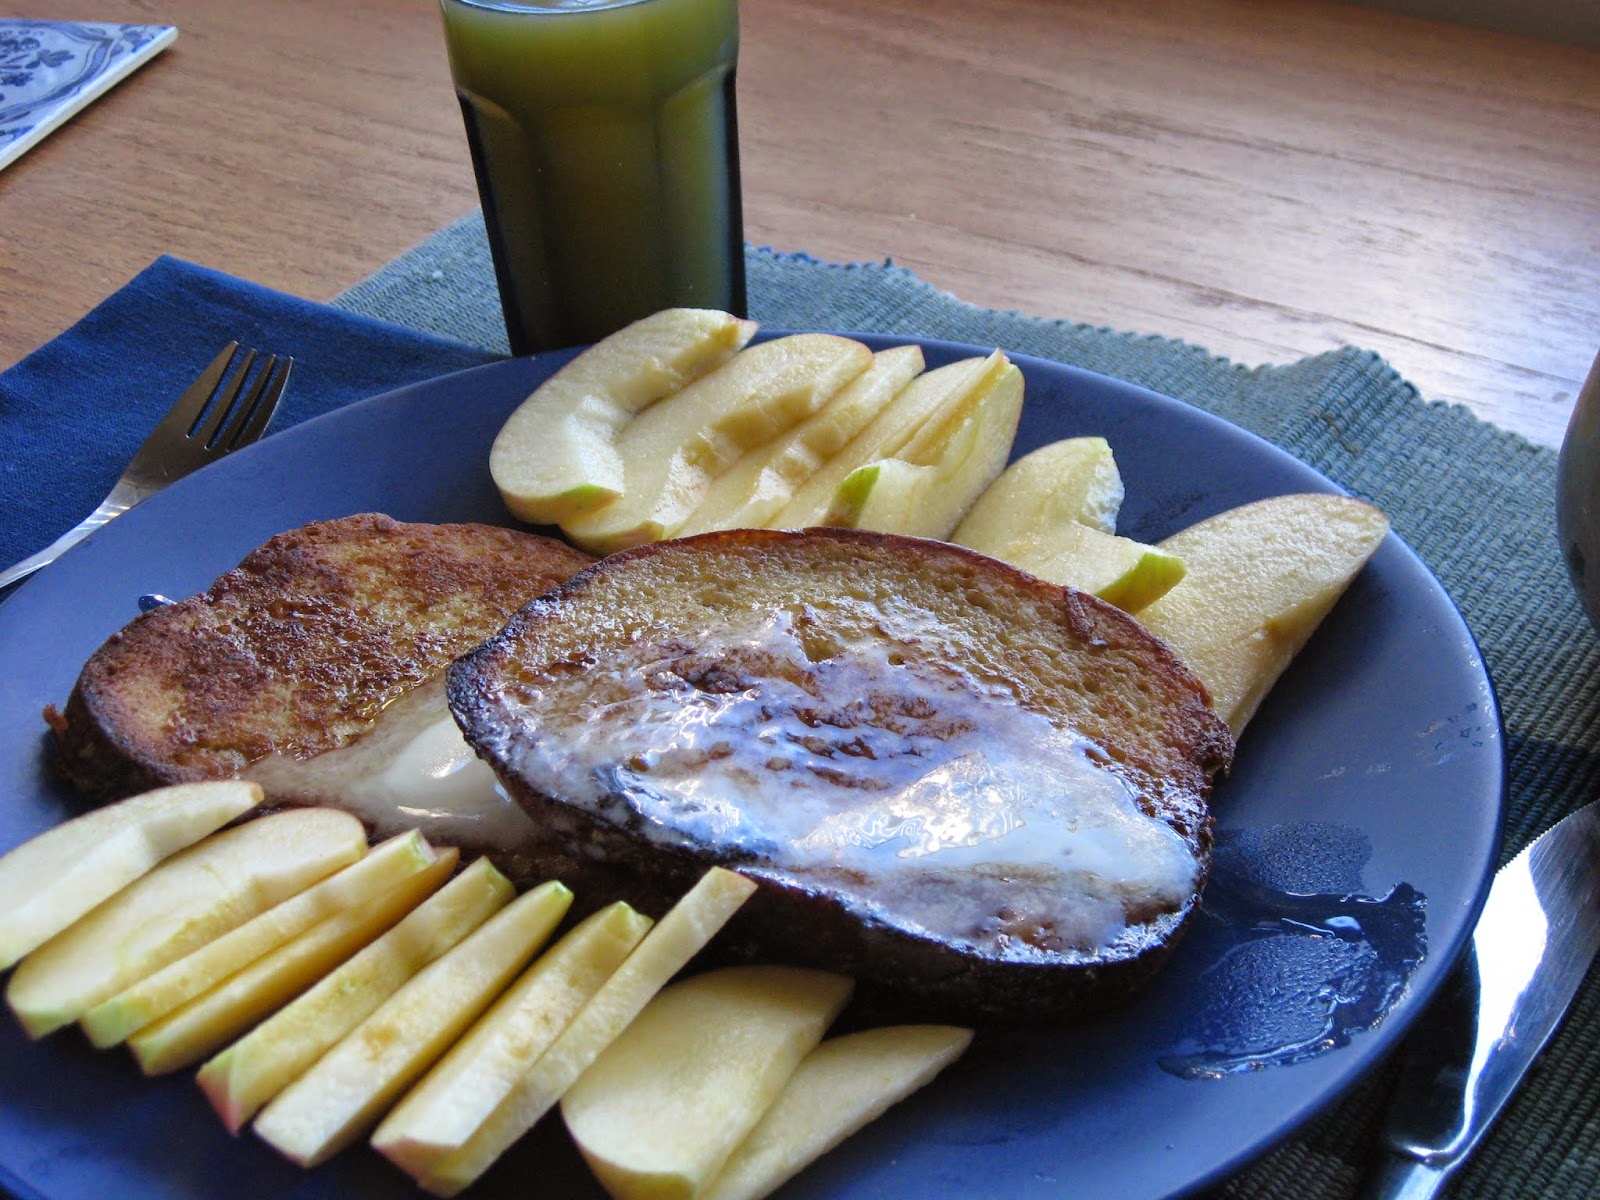
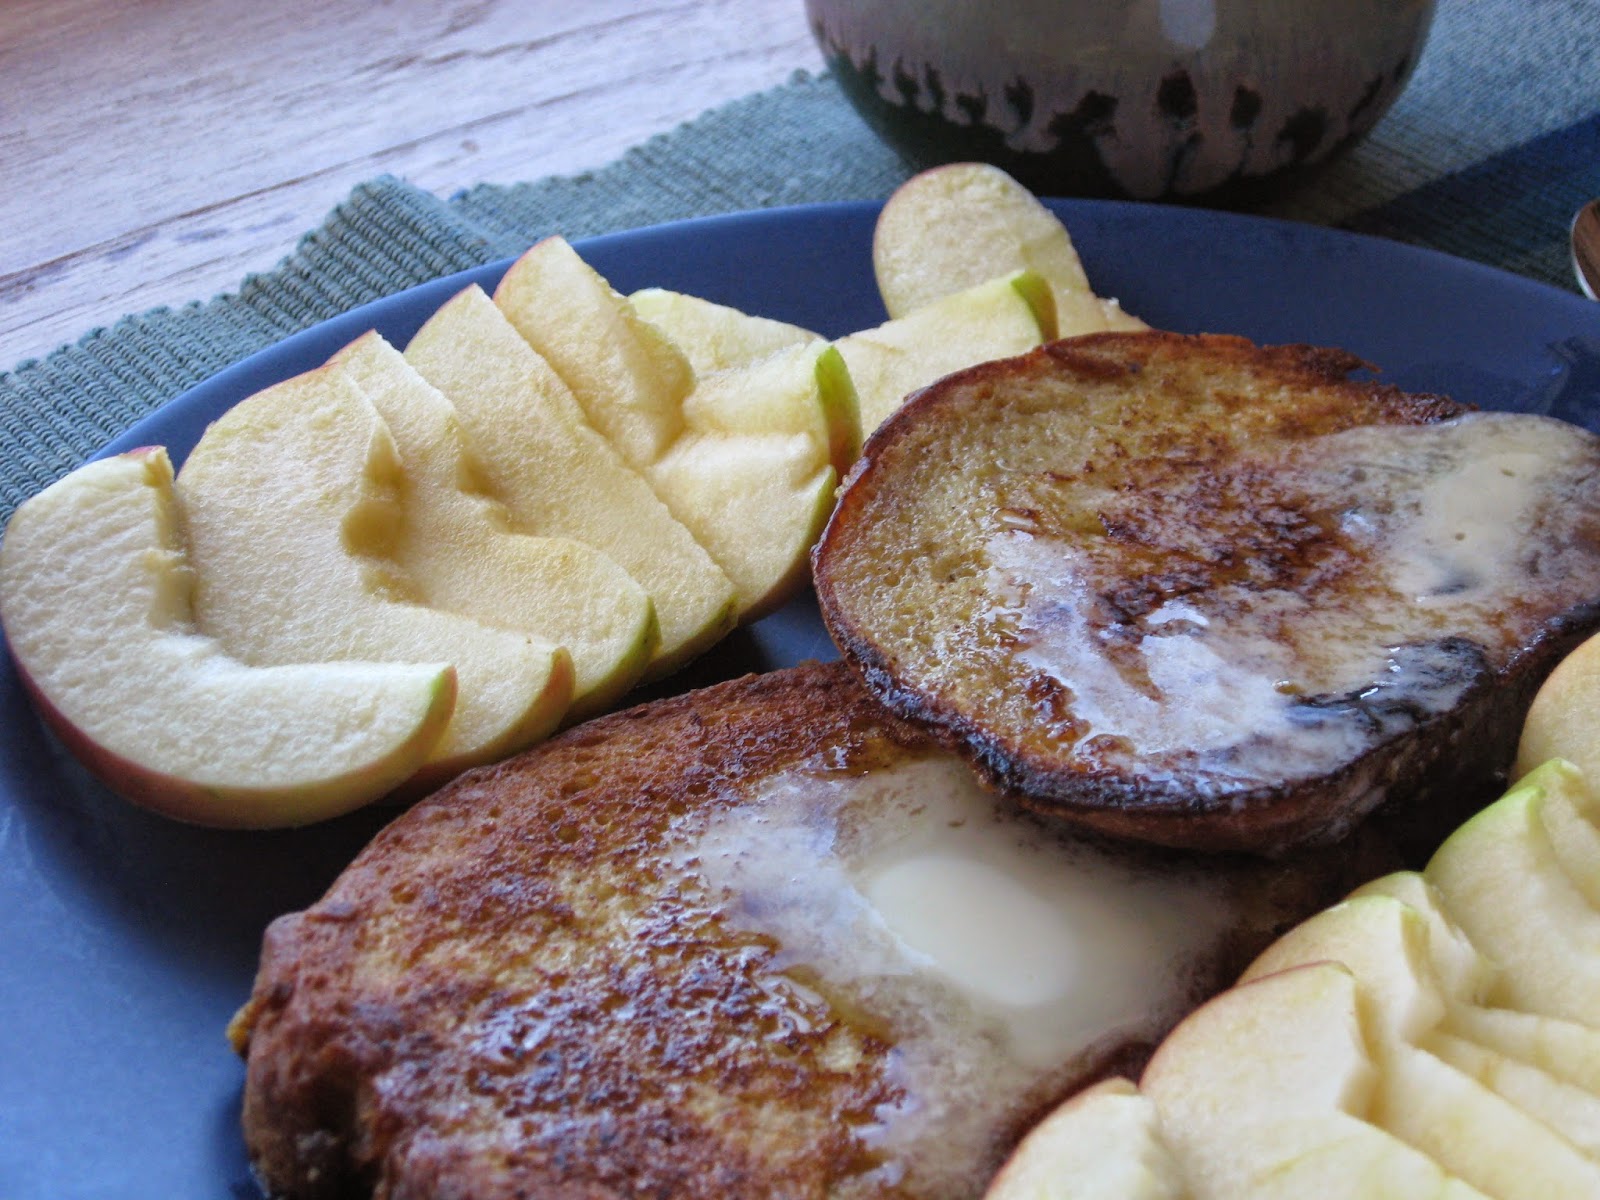
  4. Serve with powdered sugar, a tiny bit of vegan butter, maple syrup, and fresh fruit


You can make this gluten-free if you use gluten-free bread. This is one circumstance where fluffiness is irrelevant.


Variations:
  • Don’t limit yourself to the standard toppings of faux butter and maple syrup. Try peanut butter and strawberries.
  • Try applesauce and blueberries on that stack. Yum!  
  • Ice cream. Chocolate sauce. Need I say more?
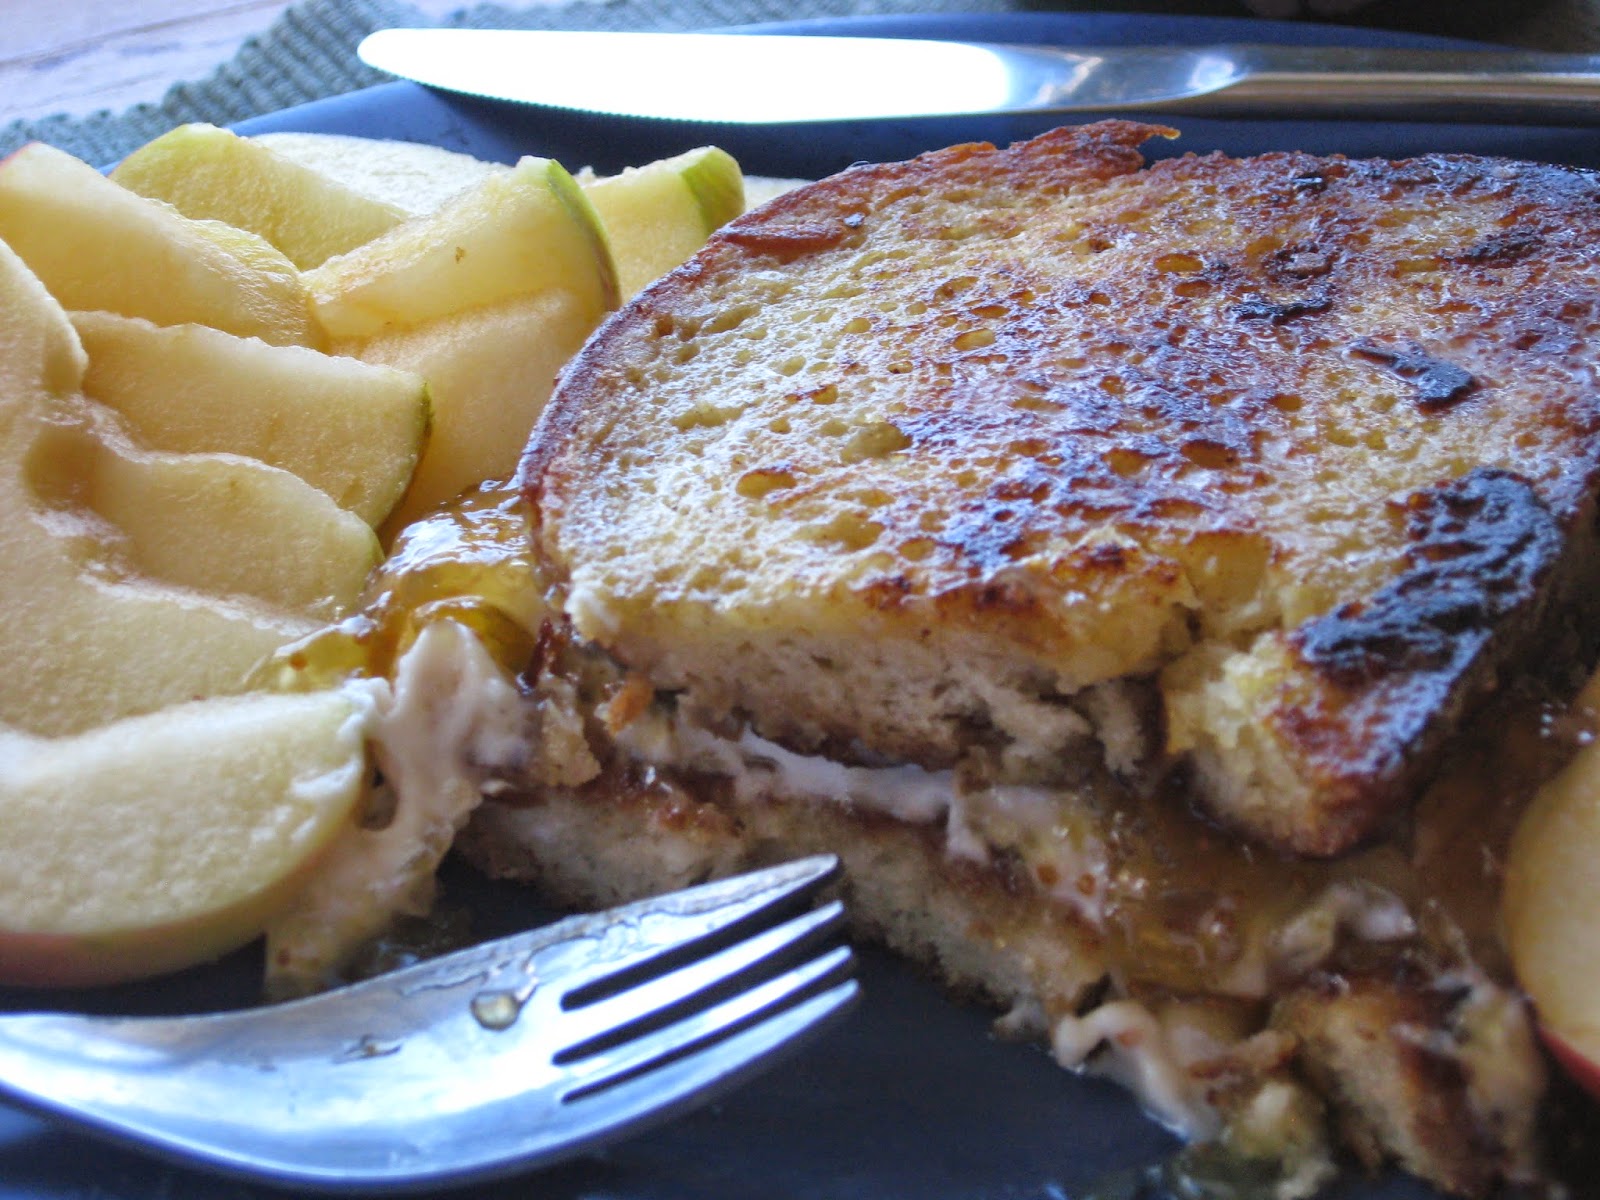
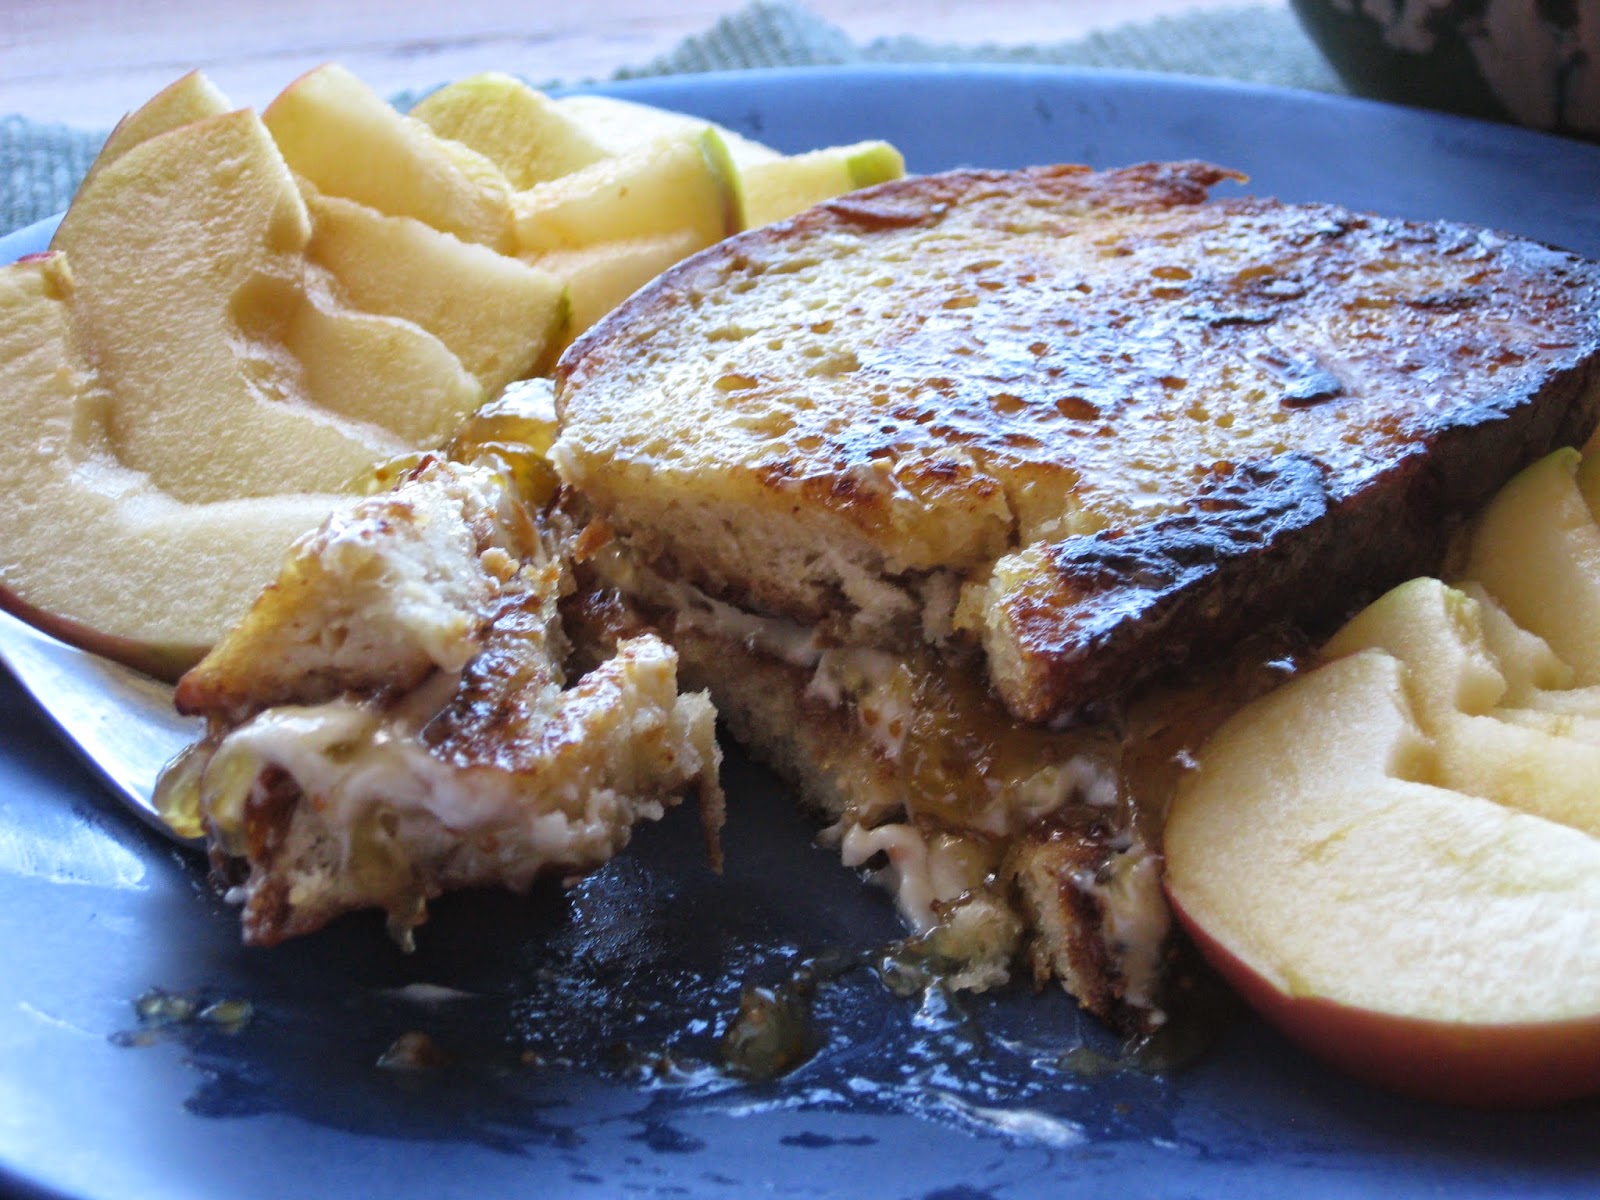
  • Try smearing a thin layer of faux cream cheese on one piece of toast and topping it with the other piece. Then blop a healthy amount of orange marmalade on there. I promise. It’s decadent, and you’ll think you’re in heaven.
  • For extra wow, do the faux cream cheese smear, then put the orange marmalade on that first slice, cover with the second slice, and then smother it with faux butter and maple syrup. OMG.


In this photo, I didn’t have any orange marmalade and had to make do with White Fig Jam. <swoons dramatically> 

Thursday, October 30, 2014

Nomlette for One


This is a surprisingly fluffy omelet. You’ll want to try it on a weekend—it doesn’t take that long, but it’s filling enough to keep you going for your whole Sunday hike.

8 oz. (1/2 package) silken tofu
1 TBLSP almond milk
1 TBLSP nutritional yeast
1 TBLSP corn starch
1 teaspoon tahini
1/8 teaspoon onion powder
1/8 teaspoon turmeric
Salt and pepper to taste
A pinch of kala namak (black salt) (optional—adds an eggy taste)

Omelet filling options (you need about a cup’s worth, once it’s all cooked down):
Mushroom
Green onions
Garlic
Olives
Avocado
Faux cheese
Faux meats (seitan or brats)

  1. If you want your filling ingredients cooked, do that first. For the omelet in the picture, I sautéed onions, garlic, and mushrooms in olive oil, and just as they were finishing up, tossed in spinach and chopped olives. When it was ready, I set it aside in a nice bowl. It’s important that the filling ingredients not be very wet. If you want your filling ingredients raw, skip this step. 
  2. In a blender or food processor, whirl away at the tofu, milk, yeast, corn starch, tahini, onion powder, turmeric, salt and pepper, and kala namak until it’s smooth.
  3. Spray or wipe a non-stick skillet or omelet pan (one that has a cover) with oil and heat it on medium high until it’s very hot. Pour the tofu mixture into the center of the skillet and smear it in a large circle evenly around the pan. It should be about 6-8 inches across. You might use a spatula or a spoon to smooth the top, just to make sure there aren’t any thin places.
  4. Once the batter is starting to firm up, place your filling ingredients on one half of it. Reduce the heat to medium low. Cover and cook for 3-5 minutes, checking it often.
  5. When the edges have dried out and the middle is no longer jiggly, loosen the omelet by sliding a spatula under the edges. You might want to work your way around, making sure that the omelet is free on all sides. If it’s not moving loosely in the pan, it’s not set, and if you try the next step too soon, you’re going to have scrambled tofu instead of an omelet.
  6. If you’re adding faux cheese, this is the time. Sprinkle it liberally around the whole tofu disk.
  7. When it’s set, fold the empty half of the omelet over the full half. If your naked omelet half is oriented away from the handle of the pan, you can tip the pan and let gravity help a bit as you use your spatula to lift the rest. You can’t really flip this omelet the way you might an egg omelet or a crepe—it’s neither thin nor dry enough.
  8. Slide it onto a plate and serve immediately. 


Wednesday, October 29, 2014

Sweet Potato Hash for One


In the mood for something substantial yet quick? This little darling of a breakfast will fill you up without taking half the morning to prepare. And it’s pretty, too!

½ a sweet potato (a third, if it’s a really big one)
1 slice onion, chopped
2 teaspoons olive oil
½ teaspoon dried rosemary
Salt and pepper to taste
1/3 cup water
1 mushroom, sliced
A handful of leafy greens (spinach, arugula, kale, whatever you have on hand)
1 clove garlic, finely chopped
1/3 cup cooked pinto beans (or other bean), rinsed thoroughly and drained

  1. Slice the sweet potato into 1/2-inch cubes. You can peel them first, if you like, but there’s a lot of nutrition in the skins, so I like to leave the peels on.
  2. In a heavy skillet, heat the olive oil. Add in the cubed sweet potato, onion, rosemary, salt, and pepper. Stir it up so that everything is coated in oil. Then add some water, maybe 1/3 of a cup, to help the sweet potato steam. How much you use depends on the size of your pan.
  3. Rinse and drain the greens. Chop up any large pieces to something manageable for eating.
  4. When the sweet potatoes are starting to be soft in the center (after about 20 minutes), add the mushrooms, beans, garlic, and the greens. Cook until the greens are just wilted.
  5. Serve immediately.


I made a little nest of chickpea, wheat berry, fenugreek, lentil, and kamut sprouts and centered this hot dish in it to serve. Yummmmm.

Tuesday, October 28, 2014

Cinnamon Roll for One


This tasty treat takes a while, but it’s a good reward breakfast. See, what you do is you make the dough, then go for a run or to the gym, and when you get back, the dough will have risen to its full glory. Believe me, you’ll want to try this little bread. And the frosting? You can also use it for gingerbread cookies, carrot cake, donuts—the frosting alone is worth the wait!
Makes 2 rolls.

3 TBLSP almond milk
1 ½ TBLSP vegan butter, divided
1 teaspoon instant yeast (about 1/3 of those little packets)
1 TBLSP sugar, divided (3 teaspoons equals one tablespoon)
Pinch of salt
½ cup plus 1 ½ TBLSP all-purpose flour
Canola oil (to coat the bowl)
Sprinkle of cinnamon

  1. In a small bowl in the microwave, heat the almond milk and ½ TBLSP vegan butter until warm and melted, but don’t boil it. This should take 20-40 seconds. Let it cool, if necessary, until you can put your finger in it, but it’s still pretty warm.
  2. Sprinkle in the yeast and let it activate for 10 minutes. If your yeast is healthy, it should be all bubbly and happy-looking. Otherwise, open a new packet and make a fresh milk and butter mixture.
  3. Add 1 teaspoon of the sugar (about a third of it) and all of the salt, and give it a quick stir.
  4. Add the flour and stir until you have a sticky dough. Dump it out on a sheet of waxed paper (for easy clean-up) and knead it for a minute or so, until it forms a soft ball. (Save the waxed paper for rolling the dough later.)
  5. Clean the bowl out and coat it with canola oil, and put the dough back in, rotating it to coat it with oil on all sides. Cover with plastic wrap and let rise in a warm place for about an hour, until doubled in size.

Tra-la-la…. Lubricate a baking pan or line it with parchment paper.
  1. On a lightly floured surface, roll the dough into a thin rectangle. It should be about 6 inches wide and perhaps 6 inches long. Okay, so maybe it’s a square. It depends on your rolling skills, really.
  2. Melt the rest of your vegan butter (1 TBLSP), and brush about half of it all over your lovely dough rectangle.
  3. Sprinkle the other two teaspoons of sugar onto the buttered surface, and then sprinkle the cinnamon on top of that.
  4. Roll the rectangle into a log, capturing the cinnamon and sugar inside. With a very sharp knife, cut the dough in half—there should be two 3-inch segments. Curl those little guys up on themselves like a snail shell. The dough will be very soft and malleable, so you can moosh the ends in neatly. You’ll want to moosh well, though, because they tend to unfurl as they rise.
  5.  Put the rolls on the prepared baking pan with the curly-cue side up. Brush the tops with the remaining vegan butter, and cover with plastic wrap. Let it rise while you heat the oven, just five or ten minutes.

Preheat the oven to 350 degrees Fahrenheit.
  1. Bake the rolls for 25-30 minutes, until slightly golden brown. Let them cool for a few minutes before serving—or frosting. Or let them cool for a few minutes before frosting and serving. As you wish!


While the rolls are baking, make the frosting, if you want.

Cream Cheese Frosting for Two Cinnamon Buns

This makes more than you need, so you might make a little carrot cake (for one) to sop up the rest.
½ TBLSP vegan butter, softened
2 TBLSP vegan cream cheese, softened
A splash of vanilla extract
½ cup plus one TBLSP powdered sugar

  1.  Combine the vegan butter and cream cheese until it’s fluffy.
  2. Add the vanilla, and stir until well-combined.
  3. Add the powdered sugar a little bit at a time. You might not want all of it, if you want a thinner, more drizzly frosting.


Monday, October 27, 2014

Cardamom and Coconut Polenta Porridge for One


I’m not normally much of a polenta fan, but if it’s creamy and cardamom-flavored, count me in! This is a great warm way to start the day. It would also make a nice side-dish for a holiday meal!

1 teaspoon coconut oil
2 TBLSP polenta (I like the coarse kind) or grits (oatmeal would be nice too)
A sprinkle of ground ginger
2 pods of cardamom, broken open and the seeds ground with a mortar and pestle
2 teaspoons ground almonds (run them through a coffee grinder or food processor)
1 ½ teaspoons brown sugar
1 TBLSP unsweetened shredded coconut
6 TBLSP almond milk (or other non-dairy milk)
Chopped or sliced almonds to garnish

This goes FAST, so get all your ingredients ready before you turn on the heat.
  1. In a saucepan, heat the coconut oil over medium heat. Once it’s hot, add the polenta granules, and stir frequently, until the polenta is golden brown and fragrant.
  2. Add in the ginger, cardamom, ground almonds, sugar, and coconut, and stir to combine.
  3. Turn the heat down to medium and add half of the almond milk. Stir until the milk is absorbed and then add in the rest. It will take about 3 minutes for the polenta to be completely soft and fluffy.
  4. You can thin the mixture with more milk, if you like it a little runny.
  5. Top with sliced almonds, fruit, if you want, and eat it while it’s hot!


Note: The photo has a doubled recipe for visual prettiness. It’s very filling, though. You won’t really need to double the recipe. 

Sunday, October 26, 2014

Gingerbread Protein Pancakes for One


Not as sweet as “regular” pancakes, these fluffy little treats are almost good for you, with extra protein in every bite. I like mine with maple syrup, but a little faux cream cheese and jam would be like visiting your childhood!

2 TBLSP unsweetened apple sauce
4 TBLSP almond milk (or any non-dairy milk that suits you)
½ TBLSP blackstrap molasses
¼ cup all-purpose flour (you can use a gluten-free flour too)
¼ scoop protein powder (I like Raw Protein plain from Garden Up, but a vanilla version would be nice too)
A pinch of baking powder
A pinch of baking soda
A sprinkle of cinnamon
A sprinkle of ground ginger
A sprinkle of ground cloves
½ TBLSP coconut oil (or other oil that suits you)

Topping Thoughts: Banana slices, clementine segments, chopped nuts, maple syrup, agave nectar, peanut butter, strawberries, blueberries, marmalade, jam, etc.
  1. Whisk the apple sauce, milk, and molasses together in a small bowl.
  2. In a separate bowl, mix the dry ingredients (up to but not including the coconut oil).
  3. Add the dry ingredients to the wet, mixing until just barely combined. If the batter seems too thick, add more milk.
  4. Heat the coconut oil in a non-stick pan over medium heat.
  5. Add half of the batter to the pan in a nice blop. I like to flatten it with the back of a spoon to make a four-inch pancake, but you probably have your own methods. Once bubbles form and pop (in about 2 minutes), flip the pancake over and cook for about 2 minutes on the other side, until brown and lovely. It will be quite dark.
  6. When the second side matches the first, remove it to your serving dish.
  7. Repeat with the other half of the batter.
  8. Top with fresh fruit, nuts, syrup—whatever you can imagine! 

Thursday, October 23, 2014

Scalloped Cauliflower for One


Are you in the mood for something warm and filling but not in the mood to slave over a hot oven? This is one of those quick-to-assemble meals that you just heave into the oven and forget until the timer goes off.  I like to serve it with a salad. Mmmmmm.

3 teaspoons vegan butter, divided
¾ cup (approximately) almond or soy milk, divided
3 teaspoons flour (you can use almond or rice flour, if you prefer), divided
1 cup cauliflower, sliced or diced
¼ cup yellow onions, diced small
Salt and pepper to taste

Preheat oven to 400 degrees Fahrenheit.
  1. In the bottom of a single-serving casserole, put 2 teaspoons of vegan butter, 2 teaspoons of flour, and 1 teaspoon of almond milk in the bottom and smoosh it all together.
  2. Place a layer of cauliflower and then a layer of onions on top of it.
  3. Cut up another teaspoon of vegan butter and put it on top of the cauliflower and onions. Sprinkle another ½ teaspoon of flour on top of that, and then drizzle another 2 teaspoons of almond milk on top.
  4. Keep building layers until your cauliflower is gone and the casserole is full. The last layer should be butter, flour, and enough milk to fill the casserole about half-way.
  5. Bake for 50 minutes. Let rest for 5 minutes before devouring!


Variations:
  • Add faux meats, like Tofurkey dogs (I like their Beer Brats).
  • Add cooked beans. You could keep it pale, like cannellini beans, or go for contrast, like kidney beans.
  • Add a little color, like string beans or broccoli. When I do this, I also like to add a little Dijon mustard and speak with a French accent.
  • Throw a few nuts into the mix and some faux cheese on top.


Monday, October 20, 2014

Avocado Alfredo Pasta Sauce for One


This unctuous sauce can make anything seem like a fancy meal, and yet it whips up in mere minutes. If you can cook noodles (or make them out of vegetables with a spiral cutter), and run the blender, you can manage this recipe, so it’s a good one for when you’re tired.

1 serving pasta (I like linguini, but you could certainly use zucchini noodles)
½ large avocado, flesh only
1 clove garlic, peeled
¼ teaspoon lemon zest
Juice from a thick slice of lemon
1 TBLSP olive oil
1 teaspoon nutritional yeast
Salt, to taste
Pepper to taste

Interesting bits:
Nuts
Cucumbers
Faux cheese
Tofu
Diced red onion
Reconstituted wakame (sea weed)
Faux sour cream

  1. Put the water on to boil for the pasta. Or, if you’re using zucchini (or other veggie) noodles, make them first.
  2. Put the avocado, garlic, zest, lemon juice, olive oil, nutritional yeast, salt, and pepper in a blender or food processor, and whirl until it’s smooth
  3. Cook the pasta and drain it. If you want a cold salad, run the noodles under cold water.
  4. Place the drained pasta in a serving dish and blop the avocado sauce on it. Stir to combine.
  5. Top with interesting bits. I like reconstituted wakame (sea weed), diced green onions, and nuts.


Variations:
  • Try it as a salad dressing.
  • Smear it on a sandwich.
  • Put it inside a vegan omelet.
  • Add a little grated horseradish or wasabi and dip vegan sushi into it. 


Thursday, October 16, 2014

Broccoli, Kidney Bean, and Almond Salad


Although in some languages “salad” means “lettuce,” this salad doesn’t demand much lettuce at all—it’s mostly there for presentation. This salad enjoys broccoli as its central star, and provides lots of opportunities to make it a high-protein meal.

2 large pieces of lettuce (I like red leaf)
Splash of olive oil
Splash of vinegar
½ can kidney beans, drained and rinsed (about 2/3 cup)
3 TBLSP raw almonds, chopped
¼ head of broccoli, chopped into small pieces
½ zucchini or summer squash, diced
½ carrot, diced
¼ cup grapes, halved
2 green onions, diced
Sprouts for garnish
Avocado for garnish

  1.  Cut or tear the lettuce into bite-sized pieces, and dress it in oil and lemon/vinegar in your serving bowl.
  2. In a mixing bowl, toss in the beans, almonds, broccoli, squash, carrots, grapes, and onions.

 Lemon Tahini Dressing

2 TBLSP tahini
1 garlic clove
¼ cup fresh lemon juice (about one whole lemon’s worth)
2 TBLSP nutritional yeast
1 TBLSP olive oil
1 pinch kosher salt
Black pepper to taste
2  teaspoons water, as needed
  1.  In food processor or blender, add the dressing ingredients and whirl until amalgamated. 
  2. Pour the dressing over the bean mixture and toss to coat everything.
  3. Put the beans and broccoli salad on top of your prepared greens, garnish it with sprouts and avocado, and serve!


Variations:
  • You could use kale, spinach, chard, or any other fresh leafy that you like, or leave it out entirely.
  • You could switch out the broccoli for cauliflower, string beans, or any other yummy veg.
  • You could grate or make noodles from the zucchini instead of dicing it.
  • You could use chickpeas or any other kind of legume—even lentils! You could also add tofu or some form of faux meat.
  • Switch out the almonds for peanuts and use peanut butter instead of tahini in the dressing. I can’t eat ‘em, but you could also add pepper flakes to the dressing, for a vaguely Thai taste. 


Monday, October 13, 2014

Millet-Stuffed Mushroom for One


Just because you’re on your own doesn’t mean you have to eat cold cereal with questionable almond milk and a geriatric banana for dinner. Nope. March right out to the kitchen and do something interesting! After all, aren’t you worthy of a fancy meal every now and then? This one isn’t even difficult and the left-over mushroom will impress your friends when you bring it to work and microwave it tomorrow.

Makes two enormous Portobello mushrooms mounded about three inches high. They’re huge, gorgeous, and delicious.

1 TBLSP olive oil
2 slices yellow onion, diced
1/4 cup uncooked millet (or couscous or other grain)
1 1/2 cups water or vegetable broth, divided
1/4 teaspoon cinnamon
1/3 cup raisins (you can use half golden, half black, or maybe try dried cranberries or cherries)
1 slice red onion, diced
¼ teaspoon salt
Freshly cracked pepper, to taste
¼ cup pine nuts or chopped cashews, divided
2 large Portobello mushrooms (or a few small ones—crimini, if Portobello aren’t available)

Preheat the oven to 300 degrees Fahrenheit.
  1. In a medium-sized saucepan, heat the olive oil, and sauté the yellow onion until it’s beginning to turn brown.
  2. Add the uncooked millet, and allow it to toast for about 2 minutes over medium-high heat, until the millet is slightly toasted.
  3. Add 1 cup of water or vegetable broth, bring it to a boil, cover, and reduce the heat. Simmer until all the liquid is absorbed and the millet is tender, about 25 minutes.
  4. Take it off the heat and add the cinnamon, raisins, red onion, salt, pepper, and ½ of the pine nuts.
  5. In a one-serving casserole dish large enough for the mushroom to lie flat in the bottom, add the remaining ½ cup of water or vegetable broth. De-stem the Portobello mushroom, stuff it with the couscous mixture, pressing it firmly into a nice mound but without breaking the darling little mushroom’s back. Place it in the casserole.
  6. Bake for 20 minutes.
  7. Top with remaining nuts and serve. 


Thursday, October 9, 2014

Mushroom Seitan Stroganoff for One


My mom used to do wonderful things with mushrooms, and come fall, I reminisce happily about dinner-time in my childhood. Here’s my vegan version of one of my favorite mushroom-y memories.

1 TBLSP olive oil
¼ yellow onion, finely chopped
1 clove garlic, minced
4 oz. fresh button or cremini mushrooms, thinly sliced (five or six medium-sized mushrooms)
Flat pasta for one serving
½  TBLSP vegan butter or olive oil
1/3 cup dry white wine
4 oz. seitan, sliced into strips or chopped bite-sized (or you could use the crumbly kind)
2/3 cup vegan sour cream (about 6 oz.)
½ TBLSP tamari (or soy sauce)
1 teaspoon water
Black pepper to taste
2 TBLSP fresh parsley, chopped finely

1.      Put the olive oil and onions in a large skillet and sauté slowly, over a medium-low heat, until caramelized, about 10 minutes.
2.      While the onions are cooking, chop the garlic and mushrooms.
3.      Put the pasta water on to boil. Add the pasta to the water when ready, but don’t let yourself get distracted and over-cook the pasta. If it finishes early, take it off the heat, drain, and toss with a little olive oil.
4.      Add the garlic to the onions and sauté for one minute. Then add the mushrooms and butter or olive oil. Raise the heat to medium-high, and sauté until the mushrooms are cooked down.
5.      Add the wine, and cook until the liquid has evaporated. Add the seitan, faux sour cream, and tamari (or soy sauce). Add a tiny bit of water or wine, if you think it needs to be more saucy.
6.      Add the cooked noodles and a tiny bit of the pasta water to the sauce.
7.      Add black pepper taste. Decorate with parsley.
8.      Serve immediately

I also like to toss in leftover (raw) string beans and cauliflower with the mushrooms (or cooked ones at the end with the noodles), or top with sliced olives or faux cheese (although it doesn’t really need the fat, what with the faux sour cream and all).


Monday, October 6, 2014

Green and White Lasagna for One


I’m allergic to tomatoes. It’s very sad, I know. But that doesn’t mean I can’t eat yummy things like pizza or spaghetti—I just use green or white sauces! In this case, I’ve used both. I couldn’t choose, and you shouldn’t have to either!

3 lasagna noodles (if using) OR ½ zucchini, sliced very thin lengthwise (I use a mandolin).
Pesto Sauce (recipe below)
Cauliflower Alfredo Sauce (see below)
3 green onions, diced small
¼ cup diced Kalamata olives
1 cup loosely packed fresh spinach
½ cup vegan cheese (I use Daiya Mozzarella shreds)

  1. Put some water on to boil and make the lasagna noodles while you make the pesto and Alfredo sauces. I like to use left-over sauce if I’ve gone all haywire with my quantities earlier in the week. I also like to use both sauces, to make it a little more unctuous (I go sparingly on the cheese), but you could use one or the other.
  2. Prepare the veggies (zucchini, onions, olives) while you wait too. You could cook the zucchini if you want, but I like the sturdiness of the fresh slices. If you use zucchini instead of noodles, you have a nice gluten-free option.
  3. When the noodles are cooked, cool them down by dropping them into a sieve and running cold water over them. You need to be able to handle them but they don’t have to be all the way cooled. You’ll also want to cut them to fit your casserole. It’s fun! It’s an art project!


Preheat oven to 350 degrees Fahrenheit.

  1. In a single-serving sized casserole, blop some pesto sauce in the bottom, spreading it neatly to the edges. This is what keeps the noodles or zucchini from sticking. You can be messy with the other layers.
  2. Now, make a neat layer of zucchini or noodles. (You can use both, if you want, but sometimes I want a gluten-free option.)
  3. Then, make layers of Alfredo sauce, onions, cheese, and spinach, noodle/zucchini, pesto, olives spinach, cheese, noodles/zucchini etc., repeating until the casserole is full. The very top should be sauce (either one) with cheese sprinkled on it.
  4. Bake for 30 minutes, until the sauce is bubbly and the cheese is melty.
Let it cool for a few minutes before devouring. It will be super hot!


Pesto Sauce

1 bunch fresh basil leaves
¾ bunch fresh cilantro leaves (you can use parsley if you’re anti-cilantro)
2 cloves of garlic (bake them if you want a milder dose)
2 TBLSP raw sunflower seeds
2 TBLSP rice vinegar
1 TBLSP olive oil (more, as needed)

Place all of the ingredients in a blender and whirl until it’s a soft mash.
Makes about 1 cup, enough for two one-person lasagnas, or a lasagna and some noodles, or a rice salad and some sandwich spread.

Cauliflower Alfredo Sauce

1/2 teaspoon olive oil
2 cloves garlic, chopped
2 loaded cups of cauliflower florets (1.5 to 2 inch pieces)
1/3 cup water
Pinch of salt
6 TBLSP non-dairy milk (I use almond milk)
1.2 teaspoon onion powder
1 teaspoon of dry thyme
1 teaspoon dry basil or 6 fresh basil leaves chopped finely
4 teaspoons nutritional yeast
1 teaspoon lemon juice
1 teaspoon extra virgin olive oil
a generous dash of black pepper
2 teaspoon flour of choice (omit to make gluten-free)

  1. Put 1/2 teaspoon of olive oil in a saucepan with a cover on a medium heat. Add the chopped garlic and cook for 2 minutes. Don’t let it brown!
  2. Add the cauliflower, water, and salt, and cover and cook for 10 minutes or until cauliflower is tender. Cool it a little bit before proceeding.
  3. Add the cauliflower and any remaining water to a blender or food processor along with the non-dairy milk, onion powder, thyme, basil, nutritional yeast, lemon juice, olive oil, black pepper, and flour (if you’re adding any). Blend to a smooth puree. Taste and adjust salt, herbs and lemon juice, if needed.
Makes a good lasagna layer, but is also excellent on pasta, rice salad, quinoa, spaghetti squash, sandwiches, steamed broccoli, or, if you’re a nut, as a dipping sauce for veggie sushi!


Thursday, October 2, 2014

Chocolate Cake for One


This is another recipe that’s a LOT of time (not work, really) for one little serving size, but I tell you…it’s well worth the effort. AND you won’t accidentally eat more cake than you should. Cakes just sit there, begging to be eaten, don’t they? This way, it’s all gone in a flash of silverware and teeth!

3 TBLSP all-purpose flour
1 TBLSP unsweetened cocoa powder
Pinch of salt
½ teaspoon baking powder
¼ teaspoon baking soda
½ banana, mashed
1 ½ TBLSP pure maple syrup {or other liquid sweetener}
¾ TBLSP melted coconut oil
½ teaspoon vanilla extract
Small handful of dark chocolate chips (optional)
1 TBLSP chopped crystalized ginger (optional)
Small handful of raisins (optional)
Small handful of walnuts (optional)

Preheat the oven to 350 degrees Fahrenheit and grease or line two ramekins. You can use a muffin tin, but the cakes will have a less-than-square shape. Perhaps it’s time to make an hour-glass or barrel-shaped cake? Or, you could pretend you work for the Ace of Cakes and do some carving. It’s up to you.

  1. In a small bowl, whisk together the flour, cocoa, salt, baking powder, and baking soda.
  2. Add the mooshed banana, maple syrup, coconut oil, and vanilla, stirring until combined.
  3. Fold in chocolate chips, ginger, raisins, and nuts (if any).
  4. Pour the batter into the prepared ramekins and bake for 15-25 minutes. Check for doneness with a toothpick. (It should come out clean.)
  5. Cool completely before removing from the ramekin.

Makes two tiny cakes. They don’t rise much.

This cake is dreamy enough that you won’t really need frosting, but if you’re going to put birthday candles in it…. Make the frosting while the cakes are cooling down. The frosting needs to rest for a bit too, and the timing should be about right.

Vanilla Frosting for One


4 TBLSP non-hydrogenated shortening, such as Earth Balance
¾ cup confectioner’s sugar, sifted
A dash of vanilla extract
A dash of almond milk (if necessary)

  1. In a small bowl, cream together all the ingredients until it’s smooth. It should be thinner than toothpaste but thicker than molasses.
  2. Let it sit for a while on the counter, so that it starts to firm up a bit. If it’s a warm day, stick it in the fridge for half an hour or so. The faux butter in there should start to seize up nicely in the fridge.
You could flavor the frosting with cocoa powder or use food coloring, if those things are what you imagine for a chocolate cake. I like the simplicity of the vanilla against the fancy dancy cake, though. If you do add (a TBLSP) of cocoa powder, you might need a little slosh of the milk or more faux butter to make it thicken up enough to spread on your cake.


Now for the fun part.
Make the frosting that pleases you, let it rest while the cakes cool completely, and then…
  1. Frost the top of one cake (after you take it out of the ramekin, silly).I like to put the cakes on an overturned ramekin on a plate so that I can better frost the little guy AND the plate collects any sloppy frosting.
  2. Once you’ve got the top of one cake frosted (and layered with fruit, if you like), stack the other cake on top of it and frost the sides and top.
  3. Decorate with sprinkles, chocolate chips, raisins, crushed nuts, cherries or other fruit. Have fun with it!
You might want to let this rest for a while. It’s easier to eat if the frosting has solidified a bit.