Search This Blog

Monday, October 3, 2016

Wasabi-Ginger Coleslaw for One


This tangy side dish can serve double duty—put it on your sandwich! Yummmm!
½ teaspoon wasabi powder
½ teaspoon water
3 leaves of cabbage, chopped (I used napa, but any kind of cabbage will do)
1 slice of red onion, diced
Small handful of cilantro or parsley, chopped
½ carrot, grated
1 radish, grated or chopped
½-inch ginger, peeled and diced fine
1 TBLSP vegan mayonnaise
½ TBLSP of pickle juice or apple cider vinegar
Ground black pepper, to taste
1 TBLSP peanuts for decoration
  1. In a small bowl, combine the wasabi powder with the water and set it aside to think about stuff. (Wasabi is a very philosophical vegetable.) Use more or less powder, depending on your tastes—just keep the ratio of water to powder the same.
  2. Chop and put the cabbage, onion, cilantro, carrot, and radish into a small bowl.
  3. The wasabi should be a nice paste, so add the ginger, mayonnaise, pickle juice, and black pepper to it. Stir it with enthusiasm to make a nice dressing. Make sure that the lumps are ginger—not wasabi—or you’re in for some trouble later.
  4. Slosh the dressing over the cabbage mixture and stir it up. Maybe “toss” is a better word.
  5. Top with peanuts and devour.


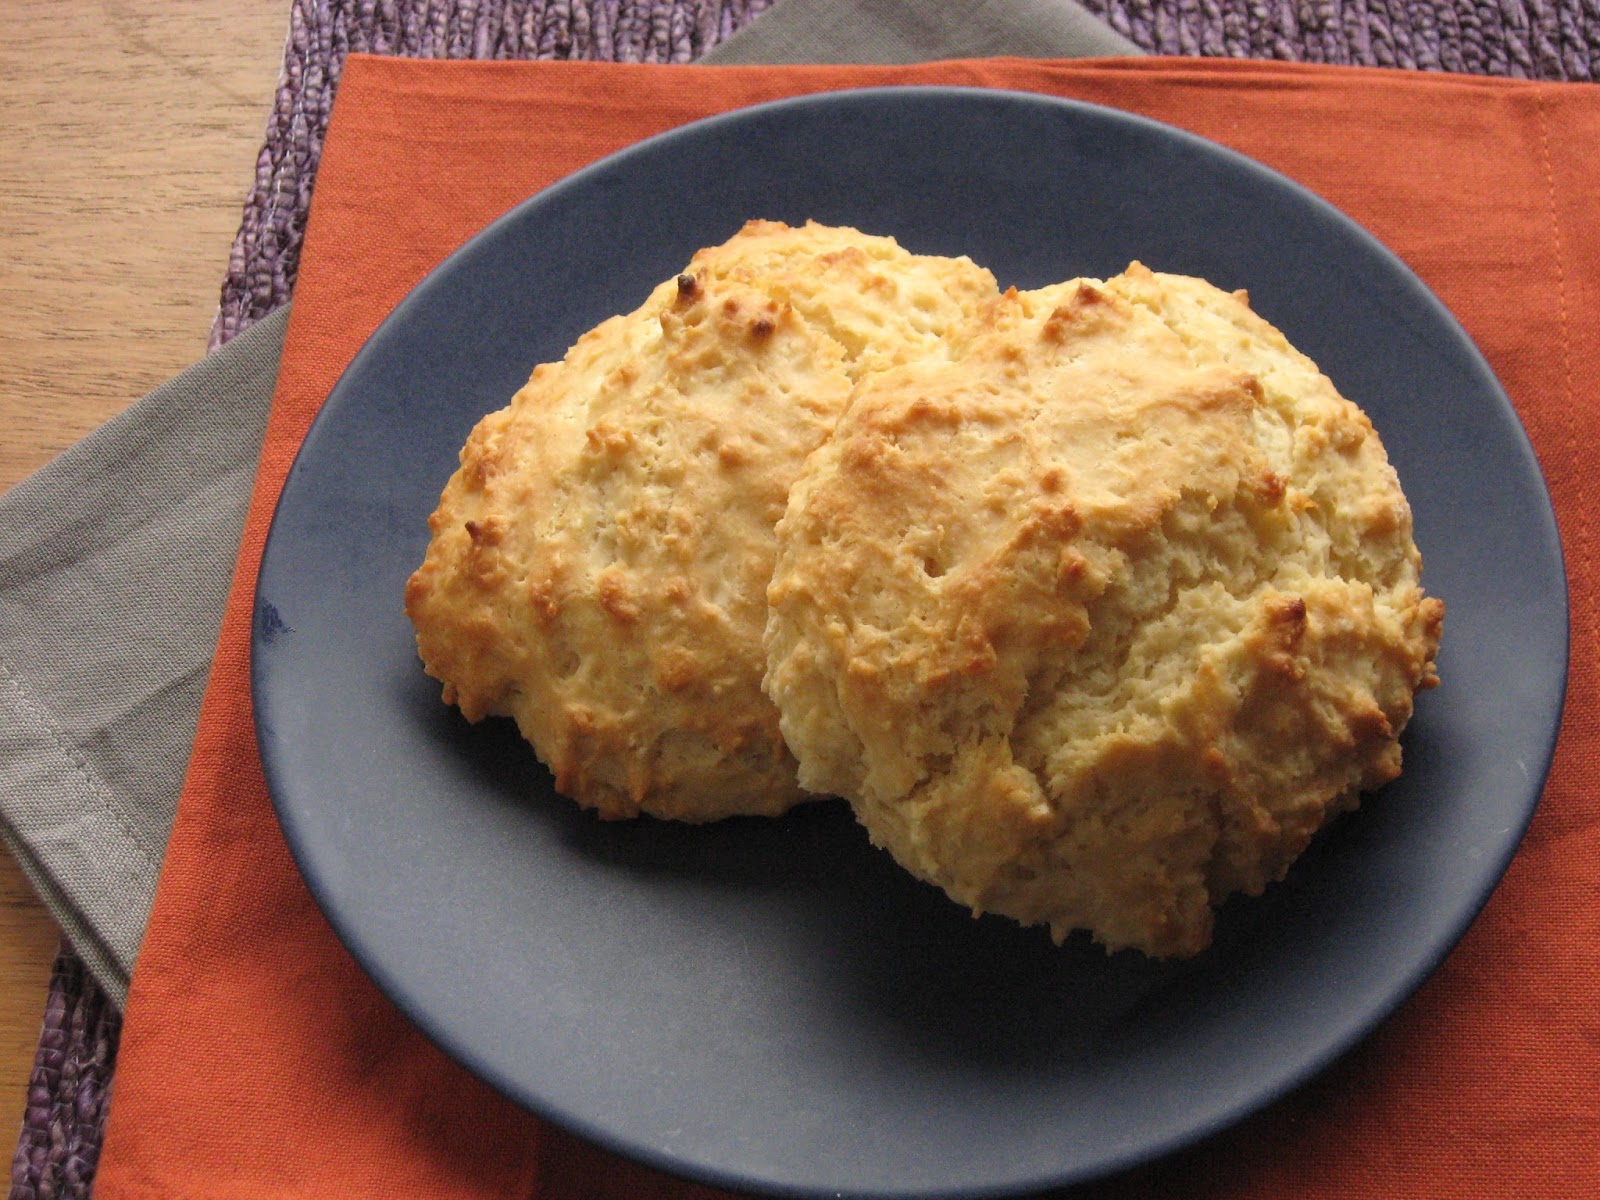
Shown here on a Buttermilk Biscuit (recipe coming soon), with roasted asparagus draped across, and some vegan mozzarella melted over the whole lovely thing under the broiler. It wasn't a tidy sandwich, but it sure was good! 


Thursday, September 29, 2016

Apricot-Glazed Cauliflower for One


Do you ever have a hankering for barbecue sauce and you’re allergic to tomatoes (on which most such sauces are based)? Try sloshing this sweet and tangy sauce on tofu, slabs of seitan, steamed veggies, or, as seen here, on cauliflower florets. Yum!

2 cups cauliflower florets
3 TBLSP apricot preserves
2 TBLSP miso (yellow or white)
2 TBLSP rice vinegar
2 TBLSP soy sauce or tamari
¼ teaspoon garlic powder
¼ teaspoon ground ginger

Heat the oven to 375 degrees Fahrenheit. Line a baking sheet with aluminum foil (for quick clean-up).
  1. Place the florets on the baking sheet and heave it in the oven while you mix up the sauce, about 5 minutes.
  2. In a small bowl, whisk together the remaining ingredients (preserves, miso, vinegar, soy sauce, and garlic and ginger powders.
  3. Pull the baking sheet from the oven and slather the florets on all sides with the sauce.
  4. Bake for 10-12 minutes.
  5. Pull the baking sheet out again, flip everyone over, and bake for another 10-12 minutes. The florets should be fork tender and the sauce should be golden brown and bubbly.


Serve with a refreshing salad. Seen here is a purple rice and zucchini salad, recipe coming soon! 

Monday, September 26, 2016

Applesauce Pancakes for One


Once the jar of applesauce is open, what are you going to do? Why, pancakes, of course!
½ cup all-purpose flour
2 teaspoons granulated sugar
½ teaspoon baking powder
Several sprinkles of ground cinnamon
A sprinkle or two of ground nutmeg
Pinch of salt
½ cup non-dairy milk (I like almond, but any will do)
¼ cup unsweetened applesauce
Slosh of vanilla extract
Non-dairy butter or coconut oil for frying
  1. In a small bowl (I like to use a cereal bowl), combine the flour, sugar, baking powder, spices, and salt. 
  2. Add in the milk, applesauce, and the vanilla, and stir until just barely combined.
  3. Put about 1 TBLSP of butter or oil into the skillet over medium-high heat. Plop the batter into the butter once it’s sizzling at about ¼ cup per pancake. You should get four of ‘em. When there are bubbles all over the surface of the pancakes, flip ‘em, frying until they’re golden brown.

Serve with sliced apples, bananas, or other fruit, and top with maple syrup, jam, or applesauce!

Variations:
  • Put slices of apple underneath the pancake batter in the pan to get an artistic effect.
  • Make a buttermilk version by combining the non-dairy milk with a slosh of apple cider vinegar or lemon juice and letting it sit for a few minutes to curdle. Then proceed as above.
  • I was running low on cinnamon, so I used cardamom. OMG. Try allspice or cloves, too. 


Thursday, September 22, 2016

Kabayaki Sauce for One


This makes about ½ a cup, so you’ll want to use it for dips, dressings, and coating your tofu.
  • ¼ cup tamari or soy sauce
  • ¼ cup mirin
  • 2 TBLSP granulated sugar
  1. Combine all ingredients in a small sauce pan.
  2. Bring them to a boil and then turn down the heat. Simmer on low heat for a few minutes.
  3. When it thickens a bit, take it off the heat, which should take about 20 minutes, depending on the intensity of your stove.


Use to marinate tempeh, tofu, permeable vegetables (like parsnips, celeriac, or mushrooms), or dress your sushi with it. Yummmm!  


Thursday, September 15, 2016

Beans on Toast for One


This is a simple English-style breakfast. You may not have had it, but once you try it, it will become a regular item. It’s fast, it’s filling, and it’s yummy!

1 slice of homemade bread (or store-bought, if that’s all you’ve got), toasted
2 TBLSP vegan cream cheese
4 TBLSP cooked beans (canned is fine. I like cannellini beans, but any will do)
1 green onion, chopped, greens and all
1/3 ripe avocado, sliced
2 TBLSP vegan cheese, shredded
Salt and pepper, to taste
  1. Put the bread slice onto a tray, plate, or baking pan that can go under the broiler.
  2. Slather the cream cheese on it (the bread, silly, not the pan).
  3. Pile the beans on top of the toast in such a way that it’s spread nicely to the edges.
  4. Sprinkle the green onion on top of that and spread out the avocado in yet another layer.
  5. Sprinkle the shredded cheese on top of the whole mishegas and festoon with salt and pepper.
  6. Put it under the broiler for 5 minutes (you’ll want to watch closely to keep it from burning).

Slice it into two pieces if you want to pick it up to eat it, or use a knife and fork as if you were a civilized person.


Monday, September 12, 2016

Tofu “Sour Cream” Dip for One


This tastes surprisingly sour, almost like sour cream.

4 ounces silken tofu (about ¼ package)
Juice from a wedge of lemon
1 clove garlic
Pinch of salt
1 TBLSP vegan mayonnaise
1 green onion, finely chopped
2 TBLSP fresh parsley, finely chopped (1/2 TBLSP dried will suffice in a pinch)
1 TBLSP fresh dill, finely chopped (1/2 TBLSP dried will do it too 
  1. Combine tofu, juice, garlic, and salt in a food processor or blender, and whirl until smooth.
  2. Remove from the processor and add in the mayonnaise, green onion, parsley, and dill. Taste for salt and possibly pepper
  3. Chill for at least ½ an hour before serving.

Makes a good dip, or use it as a topping for potatoes (I like it on sweet potatoes), or you could mix it into your pasta sauce or plop it on your steamed veggies.


Seen here over steamed veggies (broccoli, string beans, mushrooms, onion, zucchini, and kale) and rice. 

Thursday, September 8, 2016

Spiced Applesauce Cake for One


Even if Autumn is a just beginning, you can force the issue with this little cake. I’m so glad it made two little cakes! Yummmm.
For the Cake:
9 TBLSP all-purpose flour (1/2 cup plus 1 TBLSP)
½ teaspoon baking soda
¼ teaspoon salt
½ teaspoon ground cinnamon
Pinch ground nutmeg
Pinch ground ginger
Pinch of ground cloves
½ cup unsweetened applesauce
6 TBLSP brown sugar
2 TBLSP canola oil
1 TBLSP white or apple cider vinegar
Slosh vanilla extract
2 TBLSP raisins
2 TBLSP chopped walnuts
For the Icing:
6 TBLSP powdered sugar
1 ½ TBLSP maple syrup
1-3 TBLSP water or non-dairy milk

Make the Cake:
Preheat the oven to 350 degrees Fahrenheit. Lightly grease a 4-inch baking pan. A single-serving casserole will do just fine, too. Mine went nicely into TWO four-inch pans, which meant I get cake tomorrow too! Yay!
  1. In a small bowl, whisk together the flour, baking soda, salt, cinnamon, nutmeg, and ginger.
  2. In another small bowl. Whisk together the applesauce, brown sugar, oil, vinegar, and vanilla.
  3. Add the wet mixture to the dry, and stir until just barely combined. Don’t overmix or you’ll get a tough cake.
  4. Fold in the raisins and walnuts. Plop the batter into the prepared pan, making sure that the top is even. 
  5. Bake for 35-40 minutes, rotating the cake once about halfway through. Keep baking until a toothpick comes out clean.

Let the cake cool completely in the pan before removing. It will go faster if it’s up on a wire rack.
Make the Icing:
  1. In a small bowl, whisk the sugar and maple syrup together until it’s very smooth.
  2. Add the water or non-dairy milk 1 TBLSP at a time until it’s a smooth and thick icing that’s still pourable.

Assemble the Cake:
  1. When the cake is completely cooled, run a knife around the inside edge of the pan to loosen it. Unmold the cake and set it on your serving plate. You might want to put little rectangles of parchment paper under it so you can pull them out later and not have icing on your plate, but don’t worry about it too much.
  2. Lightly drizzle some of the glaze over the top of the cake. If you want it sweeter, coat the top more thoroughly. There’s plenty of icing for both little cakes and some for the cook, too!


Monday, September 5, 2016

Tofu Frittata for One


Breakfast can be quick and clean, or it can be slow and messy. This treat is a tasty combination of both, plus it will keep your engine purring all day long.

2 ounces silken tofu (about ¼ of a package)
1 TBLSP vegan butter
1 ½ teaspoons cornstarch or arrowroot
Pinch of baking powder
Pinch of salt
Pinch of freshly ground black pepper
Pinch pf turmeric
Pinch of onion powder
Pinch of garlic powder
Pinch of kala namak, or black sea salt
½ TBLSP olive oil
¼ onion, diced small
1 mushroom, diced
¼ zucchini, shredded
2 TBLSP frozen or fresh corn kernels
4 or 5 zucchini slices and some onion shreds for the top
Sprinkles of shredded vegan cheese
  1. In a blender or food processor, combine tofu, butter, cornstarch, baking powder, salt, pepper, turmeric, onion and garlic powders, and the kala namak. Set aside.
  2. In a small oven-safe skillet (non-stick, if you’ve got it), heat the olive oil over medium-high heat. Add the onions and mushrooms and let them cook until they’re soft but not completely cooked through, 2 minutes or so.
  3. Add the zucchini and corn to the onions and cook for another 2 or 3 minutes.
  4. Pour in the tofu mixture and turn the heat down to medium-low. Stir the contents a few times to make sure that it’s all pleasantly intermingled and smooth the top. Decorate with zucchini and mushroom slices. Let it cook undisturbed for 15 minutes.
  5. Place the skillet under the broiler and let it cook for 3 minutes, until the top is browned.  Watch it like a hawk so that it doesn’t burn. When it’s golden, bring it out to sprinkle the cheese on it—not much! A little bit is all you need—and put it under the broiler again for another minute or so. Be sure to protect your hand from the hot handle!


Let it sit on a wire rack (or the stove’s burner) for 15-20 minutes before removing from the pan and devouring. Eat the whole thing! You’ve earned it!  

Thursday, September 1, 2016

Banana Bread for One


I eat a banana every day. Sometimes, I just can’t look at a bowl of cereal or a smoothie, though, and I have to burst out in happy banananess!

7 TBLSP flour
Large pinch of salt
1/2 teaspoon baking powder
Small pinch of baking soda
A shake or two of ground ginger
2 ½ TBLSP sugar
4 TBLSP of mashed-up ripe banana
1 TBLSP melted vegan butter
½ teaspoon vanilla extract
1 TBLSP almond milk (optional, to moisten if necessary)
1 ½ TBLSP walnut bits
1 TBSPL chocolate chips
1 TBLSP raisins

Preheat oven to 350 degrees Fahrenheit. Spray a muffin tin (just two muffins) or mini-loaf pan with oil or cooking spray or line two muffin holes with paper.
  1. Mix the flour, salt, baking powder, baking soda, ginger, and sugar together in a small bowl.
  2. Combine the mashed banana, melted butter, and vanilla together in another small bowl. Stir the wet into the dry ingredients.
  3. Add milk by dribbles until it makes a wet and pourable batter that’s thicker than pancake batter and looser than bread dough. You may not need any milk at all, if your banana was moist enough.
  4. Add the walnut bits, chocolate chips, and raisins, and stir just enough to incorporate them. Don’t over work it.
  5. Pour into prepared pan. Smooth the top of the batter.
  6. Bake for 25 minutes or until a toothpick inserted into the middle comes out clean.

Allow to cool on a rack. It will deflate a little bit.


Monday, August 29, 2016

Sweet Potato Soup for One


If you leave this soup thick, it makes a nice mashed sweet potato dish, perfect for dipping apples into. If you thin it out, it’s a more like a traditional soup. Either way, it’s quick, easy, and delicious, and I like it somewhere in between.
Slosh of olive oil
¼ small onion, diced
¼ shallot, diced
Sprinkle of salt
Several cracks of fresh pepper
Pinch cinnamon
1 clove garlic, chopped fine
1 sweet potato, peeled and cut into 1-inch cubes
1 1/2 cup water or veggie stock

  1. In a small pot, heat the oil over medium heat and toss in the onion and shallot. Season with salt and pepper, and cook until the onions are translucent, about 5 minutes.
  2. Add the garlic and cinnamon and cook until it’s fragrant, about 1 minute.
  3. Add in the sweet potatoes and water (or stock) and bring to a boil. The water should come up the pile of potatoes about ¾ of the way. Reduce the heat and simmer for 30 minutes, until the potatoes are tender.
  4. Using a blender, food processor, or immersion blender, puree the mixture until its silky smooth. Return the soup to the pot, if necessary. Add a little more water if it’s too thick, and season with salt and pepper.
Try it with various colors of sweet potatoes for fun! 


Thursday, August 25, 2016

Kale and Broccoli Nomlette for One


This is a quick and dirty omelet, just the thing when you have a long day of work ahead of you.

For the Filling:
Olive oil
Broccoli, chopped randomly and coarsely
3 slices onion, chopped coarsely
Handful of kale, chopped coarsely
1 clove garlic, chopped fine
3 TBLSP faux cheese (I like daiya mozzarella), shredded
Avocado
For the Nomlette:
4 oz. (1/3 package) silken tofu
2 TBLSP almond milk
1 ½ TBLSP nutritional yeast
1 TBLSP corn starch
1 teaspoon white or yellow miso
1/8 teaspoon onion powder
1/8 teaspoon turmeric
Salt and pepper to taste
A pinch of kala namak (black salt) (optional—adds an eggy taste)

Make the Filling:
  1. Sauté the onions and broccoli in olive oil. 
  2. When the onions are partially transparent, add the kale and garlic. When the kale has relaxed, set aside.

Make the Omelet:
  1. In a blender or food processor, whirl away at the tofu, milk, yeast, corn starch, miso, onion powder, turmeric, salt and pepper, and kala namak until it’s smooth.
  2. Slosh a little more olive oil into a non-stick skillet or omelet pan and heat it on medium high until it’s very hot. Pour the tofu mixture into the center of the skillet and smear it in a large circle evenly around the pan. It should be about 6-8 inches across. You might use a spatula or a spoon to smooth the top, just to make sure there aren’t any thin places.
  3. When it starts to have bubbles fairly evenly across the top, spread the cheese across half of it, making a half-moon shape right to the edge.

Assemble the Nomlette:
  1. Once the batter is starting to firm up enough that you can peel an edge up with your spatula, place your filling ingredients on top of the cheese on one half of it.
  2. When the edges have dried out and the middle is no longer jiggly, loosen the omelet by sliding a spatula under the edges. You might want to work your way around, making sure that the omelet is free on all sides. If it’s not moving loosely in the pan, it’s not set, and if you try the next step too soon, you’re going to have scrambled tofu instead of an omelet. Don’t worry. It will still be quite yummy.
  3. When it’s set, fold the empty half of the omelet over the full half. If your naked omelet half is oriented away from the handle of the pan, you can tip the pan and let gravity help a bit as you use your spatula to lift the rest. You can’t really flip this omelet the way you might an egg omelet or a crepe—it’s neither thin nor dry enough.
  4. Slide it onto a plate and serve immediately. I garnished mine with avocado slices and some grapes.

Life is good. 

Monday, August 22, 2016

Cherry Cake for One


It’s cherry season, but even if it weren’t, frozen or canned cherries would be pretty good in this easy and quick cake. But fresh cherries made this little darling into something that made my taste buds do the happy dance.

7 TBLSP all-purpose flour
3 TBLSP granulated sugar
Pinch salt
¼ teaspoon ground cinnamon
¼ teaspoon baking soda
¼ cup water
¼ teaspoon apple cider vinegar
¼ teaspoon vanilla extract
4 teaspoons coconut oil, melted and cooled
¼ cup sweet cherries, pitted and diced

Preheat oven to 350 F. Lightly grease a mini loaf pan or a 5-inch cake pan. I have a 4-inch spring-lock pan that works nicely.
  1. In a small bowl, combine flour, sugar, salt, cinnamon, and baking soda.
  2. In another small bowl, mix together water, vinegar vanilla, and coconut oil.
  3. Add the dry ingredients to the wet and combine until just incorporated. Fold in the cherries until they’re just hidden in the batter. 
  4. Pour the batter into the prepared pan.
  5. Bake for 40 minutes until a knife comes out clean.
  6. Allow to cool for 5-10 minutes in the pan and then to room temperature on a wire rack.

I made a little glaze out of 1 TBLSP vegan butter (softened), ½ cup powdered sugar, a slosh of vanilla extract, and about a TBLSP of almond milk, but it got lumpy, and the truth is, this cake is moist and lovely and doesn’t need it. 


Thursday, August 18, 2016

Apricot-Glazed Fried Tofu for One


If you’re like me and you’re allergic to tomatoes but you sometimes have a hankering for barbecue sauce, you’re going to be happy about this recipe. Try it on soft cauliflower and crunchy fried tofu, and you may find that your world has been rocked.

For Serving:
Brown or white rice, or noodles
½ block firm tofu
½ cup cauliflower florets
1 small handful of green beans, cut to bite-sized
For the Sauce:
3 TBLSP apricot preserves
2 TBLSP miso (yellow or white)
2 TBLSP rice vinegar
2 TBLSP soy sauce or tamari
¼ teaspoon garlic powder
¼ teaspoon ground ginger
1 apricot, pitted and sliced thinly
For the Frying:
¾ teaspoon flax seed meal
1 teaspoon water
4 teaspoons all-purpose flour
Pinch of salt
Pinch of baking powder
Oil for frying

Deal with the Tofu:
  1. Heat the waffle iron. Yes, the waffle iron. Don’t question! Just do it!
  2. Slice the block of tofu in half so that you have slabs about 1-inch thick. Press the slabs between two plates with a couple of cans on top of them for 15 minutes or so to get the moisture out.
  3. Lubricate your waffle iron even if it’s a non-stick version (I use pan spray on the smooth side of the plate, but you can use the waffle side too). Set the slabs of tofu in there and close the waffle iron up. Mine takes about 15 minutes to create a nice golden-brown crust on both sides. Watch it, opening it up periodically to see if it’s enjoying its sojourn.

Steam the Veggies:
  1. Meanwhile, place the florets and string beans in your steamer over boiling water and get your rice or noodles cooking.

It’s also time to get the sauce going. You’ll also want to get your rice or noodles going at this time too.
Make the Sauce:
  1. In a small saucepan, whisk together the apricot preserves, miso, vinegar, soy sauce, and garlic and ginger powders. Once it’s well combined, toss in the apricot pieces.
  2. Cook over a gentle heat until it’s thickened and reduced a little bit.
  3. Set aside.

Fry the Tofu:
  1. In a tiny bowl, combine the flax and water and set aside to become a gooey mess.
  2. In a bowl large enough to hold the tofu, combine the flour, salt, and baking powder. By the time you’ve got that stirred up, the flax should be gloppy, so add that in too.
  3. Stir it together. If it’s too thick (which is likely), add a little more water until it’s about the consistency of pancake batter.
  4. Cut the ironed tofu into 1-inch cubes. Some of it will crumble. That’s okay.
  5. Plop the tofu into the batter and roll it gently around until it’s nicely coated.
  6. In a skillet, heat about ¼-inch of oil (I use canola oil, but you use whatever you like) until it shimmers.
  7. Drop the tofu cubes into the oil one at a time. Give them some space or they will stick to one another. 
  8. When the bottoms are golden, flip them over. You might need to do four sides or six, depending on how deep and hot your oil is. Mostly, the tofu is cooked, so you’re just getting a crispy batter coating to be golden.

Assemble the Meal:
  1. Make an artful array of the rice or noodles.
  2. Add the veggies to the top and drizzle some of the glaze over them.
  3. Set the tofu to one side or right in the middle of your steamed veggies and drizzle the rest of the glaze over that. You might roll the little fried darlings around in the sauce to get a more even coating, but it will make them slightly soggy. So at your own risk…


Devour with the joyous hum of a thousand wasps. 


Monday, August 15, 2016

Noodle Salad for One


I make this tasty bowl-full all the time. It’s easy, fast, and uses just about all the leftovers in the fridge, and best of all, it tastes great!

1 large handful noodles (I like corn and quinoa—gluten-free—penne, but anything will do)
1 small head broccoli, cut into florets
5 stalks asparagus, cut into 1-inch pieces
5 slices zucchini, cut into sixths
½ carrot, diced
5 slices cucumber, diced
1 green onion, diced
1 ½ TBLSP vegan mayonnaise
1 tsp Dijon-style mustard
1 ½ teaspoon pickle relish, or 2 slices of pickle, diced
1 TBLSP lemon juice, pickle juice. or rice vinegar
Pinch dried parsley
Pinch dried basil
Pinch of garlic powder
Pinch of salt (if you’ve used pickle juice, it’s salty, so taste first!)
Pinch of freshly ground black pepper
Pignolia or other nut
  1. Get the water boiling and toss the noodles in when it’s ready. Follow the manufacturer’s direction, and don’t overcook them. Drain and put into a bowl.
  2. In another pan, get the broccoli florets, asparagus pieces, and zucchini bits boiling. Don’t overcook these either! Drain, and plop them into the same bowl as the noodles.
  3. Add the diced carrot, cucumber, and green onion to the bowl with the noodles and cooked veggies.
  4. In a small bowl, mix together the mayonnaise, mustard, relish/pickle, lemon juice, and the dried herbs and spices.
  5. Combine the dressing that you just made with the noodles and mix them gently. Top with the seeds or nuts.
  6. Refrigerate for 30 minutes and then devour, or take it on a picnic, for a fun time.


Thursday, August 11, 2016

Lemon-Blueberry Yogurt Cake for One


If you want a dessert that’s moist, refreshing, and not terribly sweet, this is the cake for you. Feel free to use frozen blueberries if it’s not blueberry season.  When I was little, I told people that frequent consumption of blueberries was the reason my eyes were so very blue. That’s another reason to eat this cake. To maintain the paint job on your eyebulbs.
For the Cake:
3 TBLSP non-dairy milk (I like almond milk, but it’s your choice)
1 ½ teaspoon lemon zest
1 TBLSP lemon juice
2 TBLSP non-dairy yogurt (I like coconut milk yogurt, but it’s your choice)
¾ teaspoon ground flax seed meal
Slosh of vanilla extract
2 1/3 teaspoons coconut or vegetable oil
½ cup all-purpose flour
3 TBLSP granulated sugar
1 teaspoon baking powder
Pinch of salt
¼ cup blueberries
1 ½ TBLSP more blueberries
For the Glaze:
½ cup confectioner’s sugar
Pinch of lemon zest
½ TBLSP softened vegan butter
1 TBLSP lemon juice

Make the Cake:
Preheat the oven to 350 degrees Fahrenheit. Grease a 5-inch cake pan. I use a 4-inch spring-form pan and make it thick.
  1. In a small bowl, combine the milk, zest, lemon juice, yogurt, flax, vanilla, and oil.
  2. In a separate bowl, combine the flour, sugar, baking powder, salt, and blueberries.
  3. Add the dry ingredients to the wet and mix until just barely combined.
  4. Plop the batter into the prepared pan and sprinkle the remaining blueberries on top.
  5. Bake for 45-50 minutes or until a toothpick comes out clean when inserted into the center.

Cool in the pan on a wire rack for 15 minutes, and then remove the cake and cool the rest of the way.  
You could stop right here, or you can make the glaze.
Make the Glaze:
  1. In a small bowl, combine the sugar, zest, lemon juice, and butter. If it’s not runny enough, add more lemon juice.

Devour like the crude monster that you know you really are when it comes to blueberries and cake. Oh wait. That’s me. Feel free to consume this with your usual elegance. (Carry on.)

Variations:
  • Instead of frosting with the glaze, try smearing some lemon yogurt on the cake.
  • Instead of vegan butter in the glaze, use vegan yogurt. 


Monday, August 8, 2016

Buttermilk Biscuits for One


These little charmers are surprisingly delicious and fluffy. I used ‘em to make a sandwich (wasabi-ginger coleslaw—recipe coming soon—roasted asparagus, and melted vegan mozzarella), but they’d be great slathered in vegan butter or doused in some mushroom gravy too! (Makes two biscuits.)

½ cup all-purpose flour
Pinch baking powder
Pinch salt
Pinch baking soda
1 TBLSP vegan butter
¼ cup non-dairy milk (I like almond)
1 TBLSP apple cider vinegar

Preheat oven to 425 degrees Fahrenheit. Line a baking sheet with parchment paper.
  1. In a small bowl, combine the flour, baking powder, salt, and baking soda.
  2. Cut the butter into small cubes and then work it into the flour with a fork. The mixture should be crumbly.
  3. In a small bowl, glass, or measuring cup, add the vinegar to the milk. It will curdle almost immediately, but if it doesn’t, give it a little help with a stir or two.
  4. Dump the buttermilk that you just made into the flour mixture and combine with a fork until it’s combined. It will be a wet and sticky dough.
  5. Shape the dough into two disks. You can use a cutter If you like, or go for something more organic. I like to think of the shapes I make as “round-esque.”
  6. Put the rounds on the baking sheet and make a thumbprint in the middle of each.
  7. Bake for 15 minutes, until browned.


Eat as soon as they’re cool enough to handle. They taste nice when they’re cold too, but you’ll have a dreadful time waiting that long. 


Thursday, August 4, 2016

Buckeye Candies for One


There are times when you want a little sweet, something special, and something you don’t have every day. Well, these everyday ingredients go together in the nicest way. Here’s a shout out to my friends in (and from) Ohio!

1/4 cup peanut butter
4 teaspoons vegan butter, softened
Dash of vanilla extract
2/3 cup confectioners' sugar
4 TBLSP vegan chocolate chips
1 teaspoon coconut oil

Line a dinner plate with parchment or waxed paper.
  1. In a small bowl, combine peanut butter, butter, vanilla and confectioners’ sugar. You will need a little muscle for this.
  2. Shape the resulting glop into 1-inch balls. You should get somewhere between a dozen and 16 balls, depending on their size. Place the balls on the prepared dish and refrigerate them.
  3. Melt the chocolate chips and coconut oil in a double boiler (or microwave the chips and add the oil to the hot chips).
  4. Using a toothpick, pick up the peanut butter balls one at a time and dip them into the chocolate. You’ll only want to go part-way up the sides. Wipe off any extra on the edge of the chocolate bowl before placing on the dish so you don’t waste chocolate with big puddles underneath the buckeyes.
  5. Refrigerate the resultant cuties for 30 minutes, or, even better, stick them in the freezer. They’re particularly yummy when they’re half frozen! Eat them when the chocolate is a nice hard shell.


If there’s leftover chocolate, toss some dried fruit (apricots, raisins, cherries—whatever you’ve got) or nuts in there and put ‘em on a plate in the freezer too. Yummmm.


Tuesday, August 2, 2016

Banana Cake for One


I love bananas, and I always have. When I was a kid, my mom always made me banana cakes for my birthday, but I thought why wait for once a year? This is a perq of being a grown-up. You can eat cake whenever you want to.

½ cup all-purpose flour
1/3 teaspoon baking soda
Pinch salt
A shake or two of nutmeg
¼ cup granulated sugar
1 TBLSP canola oil
1 ripe banana, smashed
1 TBLSP water
Slosh of vanilla extract

Preheat the oven to 350 degrees Fahrenheit. Lightly grease a 4- or 5-inch baking pan. I often use a single-serving casserole to great success.
  1. In a small bowl, combine the flour, baking soda, salt, and nutmeg.
  2. In another small bowl, whisk the sugar and the oil together, and then add the banana. Add the water and vanilla to this sloppiness and stir to combine.
  3. Add the flour mixture to the sugar mixture, just barely combining it all.
  4. Bake for 35-40 minutes, until a toothpick inserted into the center comes out clean.

Let it cool for 5 minutes on a wire rack, and then remove from the pan to cool the rest of the way.

Variations:
  • Toss some raisins, walnuts, or chocolate chips in there. Or go nuts and toss in all three. About a TBLSP of each would do it.
  • Frost with cream cheese-based frosting (2 TBLSP vegan cream cheese, 4 teaspoons vegan butter, approx. 10 TBLSP powdered sugar, slosh of vanilla), as seen in these photos.


Thursday, July 28, 2016

Plum Torte for One


I love plums. I’ll eat them just about any way, but I find that this quick little treat is one of the best.

¼ cup plus ½ TBLSP granulated sugar, divided
2 TBLSP vegan butter
¼ cup all-purpose flour
Pinch baking powder
Sprinkle of ground ginger
1 TBLSP non-dairy plain or vanilla yogurt (I use soy, but use whatever you like)
1-2 small plums, quartered and pitted
½ teaspoon lemon juice
Sprinkle of ground cinnamon

Preheat the oven to 350 degrees Fahrenheit. Lightly grease a 4- or 5-inch cake pan.
  1. In a small bowl, cream the sugar and butter until they’re fluffy.
  2. Add the flour baking powder, and ginger, and incorporate them well.
  3. Add the yogurt and mix it all together.
  4. Pour the batter into the prepared cake pan, smoothing the top. Arrange the plums pleasantly on the top, skin side up.
  5. Sprinkle lemon juice on the plums, just enough to get their surfaces shiny and wet, and then sprinkle the cinnamon and the ½ TBLSP of sugar onto it.
  6. Bake for 45-50 minutes, until a toothpick inserted in the center comes out clean.


Cool on a rack.


Monday, July 25, 2016

Chocolate Cherry Cake with Chocolate Glaze for One


It’s summertime and there’s fresh fruit on every corner. Cherries have been really good this year and I may have bought too many. What to do, what to do…
For the Cake:
6 TBLSP all-purpose flour
3 TBLSP granulated sugar
4 teaspoons cocoa powder
1/2 teaspoon espresso powder
1/4 teaspoon baking soda
Pinch salt
Slosh vanilla extract
1/4 teaspoon apple cider vinegar (or lemon juice)
4 teaspoons vegetable oil
1/4 cup water
1/2 cup dark cherries, pitted and halved
For the Glaze:
1 ounce dark chocolate (that’s about 15 dark chocolate chips, if you don’t have a scale)
1/2 tablespoon hot water
Slosh vanilla extract
Sliced or chopped fresh cherries (for garnish)
Make the Cake:
Preheat oven to 350 degrees Fahrenheit. Grease a 4-inch round cake pan. I often use a single-serving casserole for a cake pan.
  1. In a small bowl, whisk together the flour, sugar, cocoa, espresso, baking soda, and salt.
  2. Add the vanilla, vinegar, oil, and water and combine until the batter is smooth.
  3. Stir in the cherries. Plop the batter into the prepared pan.
  4. Bake for 35 minutes, or until a toothpick inserted into the center comes out clean.

Let it cool in the pan on a wire rack for 5-10 minutes and then get all the rest of the way cool before applying the glaze.  
Make the Glaze:
  1. In a double boiler, melt the chocolate. Stir in hot water and vanilla extract and stir until it’s glassy smooth. If the chocolate appears to seize up, keep stirring. After a few minutes, it will turn into a workable consistency.

Assemble the Cake:
  1. With a delicate touch, spread the glaze onto the cooled cake and garnish with fresh cherries.

This cake can be served cold from the refrigerator or at room temperature.


Thursday, July 21, 2016

Plum Breakfast Bar for One


This little treat is substantial enough to keep you happy all day. It’s not terribly sweet despite the dates and banana, and get this—you can make it gluten-free, and it’s just as happy a plate of wonderful.
¼ cup whole wheat flour (spelt or almond flour would do just as nicely)
¼ cup oats
¼ teaspoon cinnamon
Pinch baking powder
Pinch salt
1 or 2 (depending on their size) dates, chopped
Slosh vanilla extract
1/3 ripe banana
4 teaspoons non-dairy milk (I like almond)
½ teaspoon apple cider vinegar
2 fresh plums, pitted and sliced thinly

Preheat the oven to 400 degrees Fahrenheit. Grease a 5-inch baking pan. I used an oval casserole.
  1. In a small bowl. Combine the flour, oats, cinnamon, baking powder, and salt. Mix them well.
  2. Using a blender or food processor, whirl the dates, vanilla extract, banana, milk, and vinegar for a bit. It will be a little lumpy.
  3. Add the date mixture to the flour mixture and combine it well.
  4. Plop the batter into the bottom of your baking pan and spread it out, making the surface flat. Arrange the plum slices artfully on top.
  5. Bake for 20-25 minutes, until a toothpick comes out clean.

Cool on a wire rack for 5 minutes before pulling it out of the pan and slicing it. It has just the right amount of chew to go with your cuppa.
Variations:

  • Leave off the plums and add dried thyme to the dough instead of cinnamon, and top it with olives for a savory version.