Search This Blog

Saturday, November 29, 2014

Apple Ginger-Spice Cookies for One


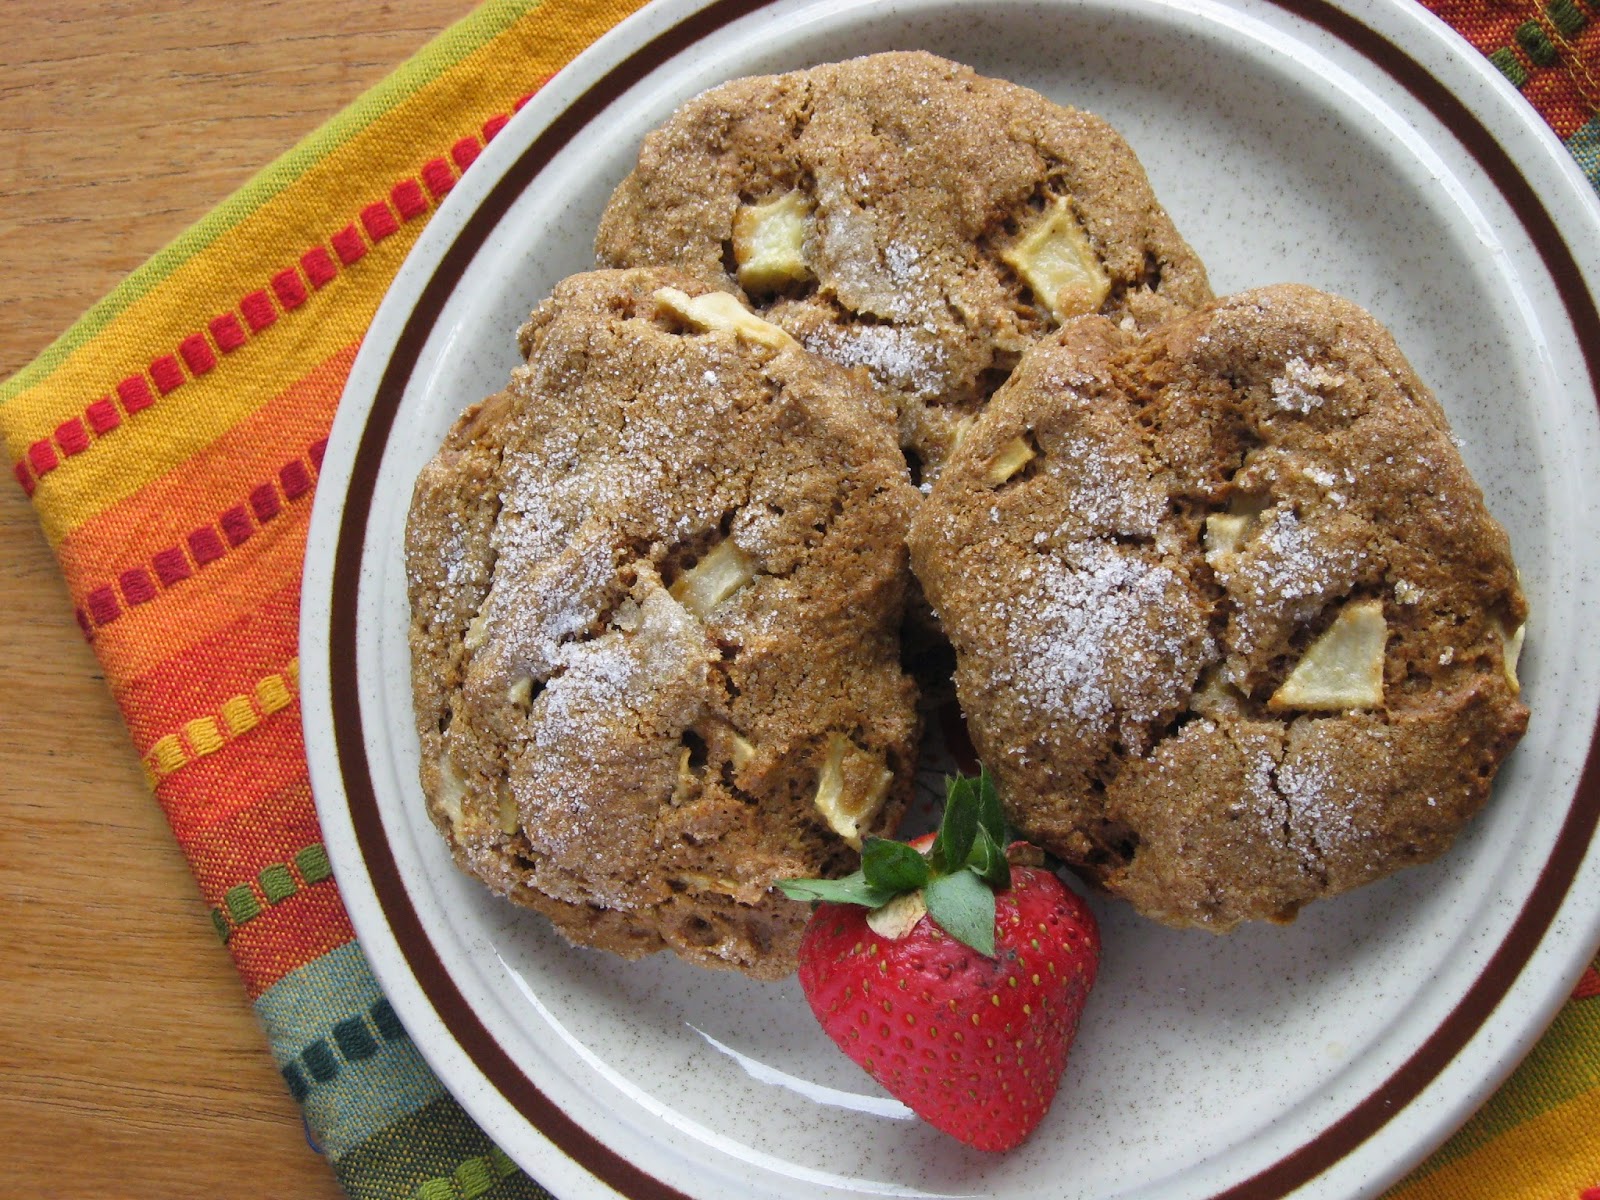
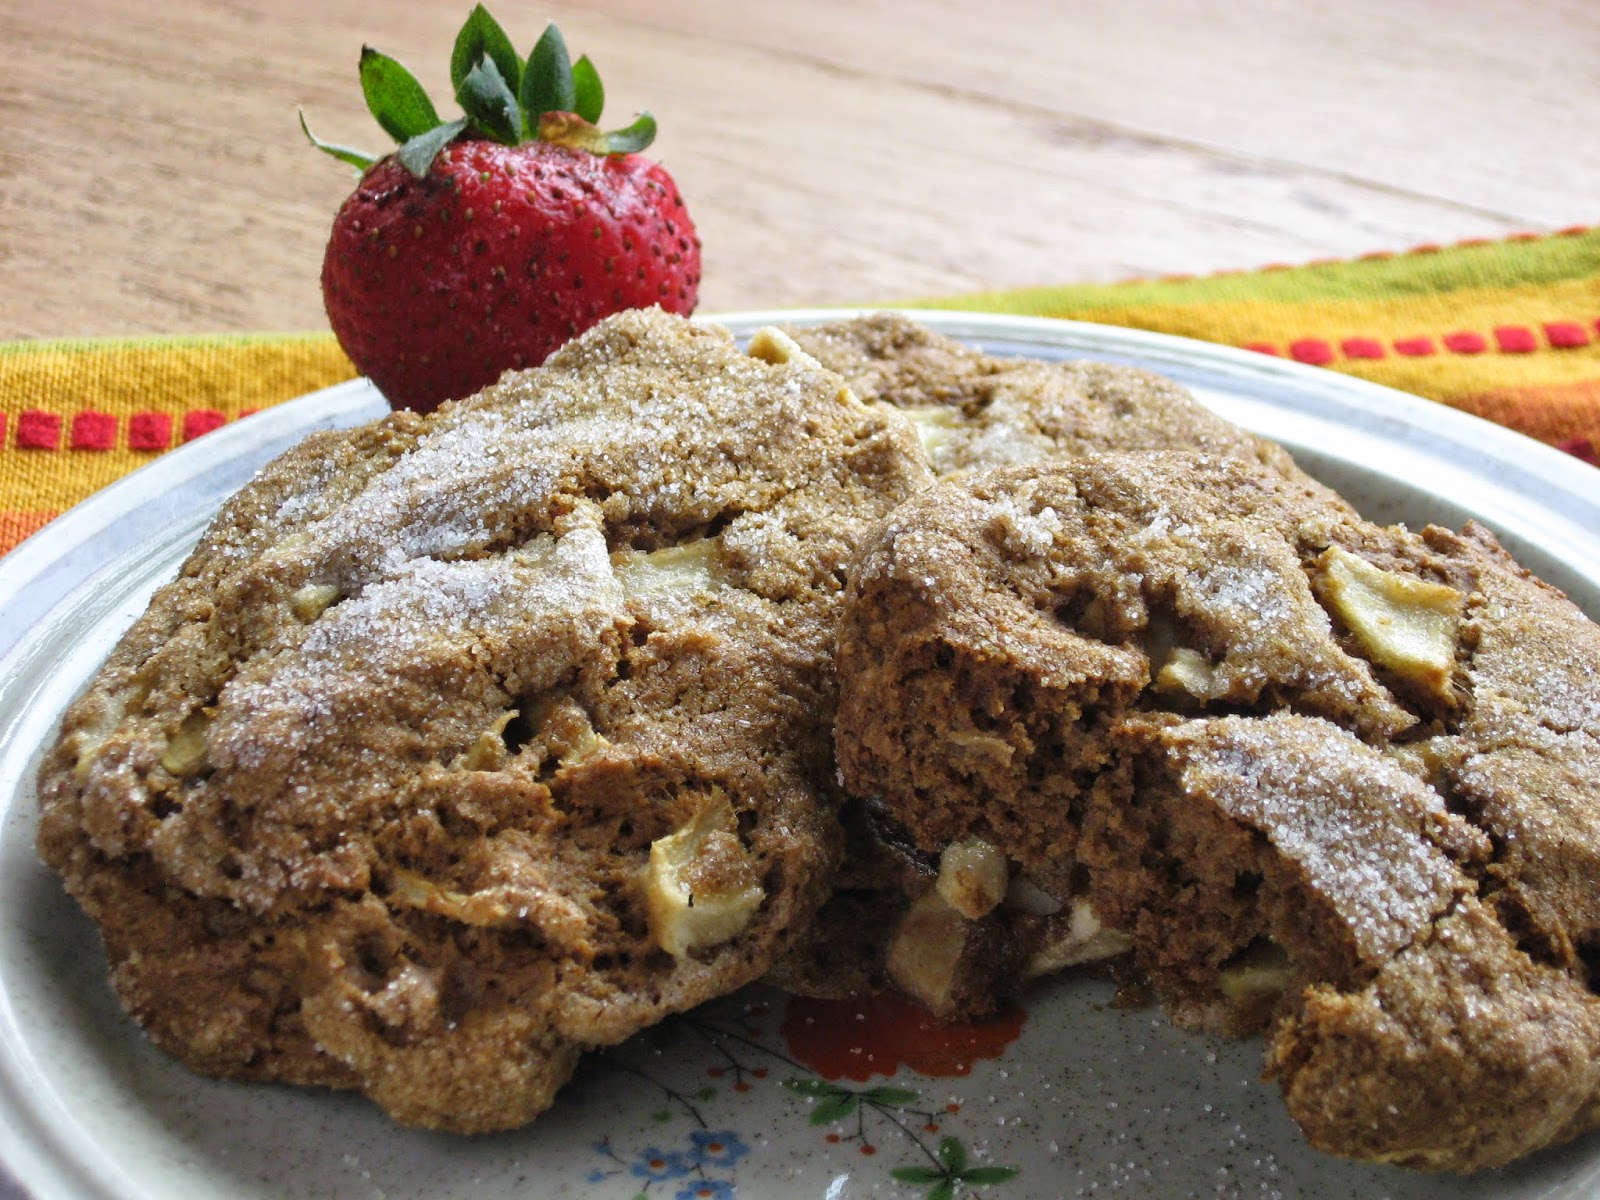
This little treat makes me happy. The combination of molasses and applesauce speaks to my childhood and at the same time is a very grown-up combination. It’s a puffy and light cookie, and I’m very glad that the recipe makes three of them. This and a cup of tea and my happiness is complete! 

5 TBLSP all-purpose flour
Pinch baking powder
Pinch of baking soda
Two shakes of ground ginger
A hefty shake of ground cinnamon
A dash of ground nutmeg
Pinch of salt
2 ½ teaspoons canola oil
2 teaspoons unsweetened applesauce
1 ½ teaspoons molasses (I used blackstrap, but you could use plain, if you want a less bold taste)
1 ½ TBLSP granulated sugar, plus 1 TBLSP for rolling cookies
¼ apple, peeled and finely chopped apple (I like Grannysmith, but use whatever you like)

Preheat oven to 325 degrees Fahrenheit. Line a baking sheet with parchment paper or coat it with cooking spray.
  1. Whisk flour, baking powder, baking soda, and spices in a small bowl.
  2. In another small bowl, whisk together the oil, applesauce, and molasses. Add 1 ½ TBLSP sugar to this mixture.
  3. Add the flour mixture to the oil mixture and fold it in. It will be a stiff dough. When it’s mostly combined, add in the chopped apple. Don’t over mix it!
  4. Roll the dough into rough balls and roll each ball in the remaining TBLSP of sugar. I got three balls, each a little bigger than 1-inch in diameter.
  5. Place the cookies on the prepared baking sheet and flatten them a bit.
  6. Sprinkle any remaining sugar lightly over the top of the cookies.  
  7. Bake for 20 -25 minutes, until the tops of the cookies are dry and the bottoms are golden brown. Cool them without moving them in the pan or they will crumble. They stiffen up as they cool. 


Friday, November 28, 2014

Apple Cinnamon Scone for One


Are you looking for something luxurious and comforting in the morning, but you don’t want to make a big production out of it? Guess what! This little apple scone solves that problem easily.

For the Scone:
¾ cup unbleached all-purpose flour
2 TBLSP brown sugar
¾ teaspoon baking powder
Pinch of salt
½ teaspoon cinnamon
2 1/3 TBLSP cold vegan butter, cut into pieces
½ apple, peeled and cut into ¼ inch pieces
1 ½ TBLSP applesauce
3 TBLSP almond milk (or non-dairy milk of your choice)

For the Topping:
A slosh of almond milk
2 teaspoons brown sugar
Pinch of cinnamon

For the Glaze (optional):
2 TBLSP confectioners’ sugar
1 teaspoon applesauce
Slosh of almond milk

Preheat the oven to 400 degrees Fahrenheit. Line a baking sheet with parchment paper.

Make the Scone:
  1. In a small bowl, combine the flour, sugar, baking powder, salt, and cinnamon. Chop in the vegan butter with a fork or a pair of knives or a pastry cutter until the mixture resembles a coarse meal.
  2. Add in the apples, stirring gently.
  3. In another bowl, whisk the applesauce and almond milk together.
  4. Add the applesauce mixture to the apple and flour mixture, stirring gently. You might need a few more drops of milk to make the dough hold together. It shouldn’t be wet, though.
  5. On the prepared baking sheet, pat the dough into a rough round (or two), about 1-inch high. If you want, cut it (them) into wedges or in half, but you’ll be devouring the whole thing all at once, so it’s really a matter of how dainty you’re going to be about it.

Make the Topping:
  1. Brush the scone(s) with almond milk. I slosh a little into a tiny bowl or a tablespoon and use the back of a teaspoon or my fingers, but you could use a brush if you’re fastidious.
  2. In a small bowl, combine the brown sugar and cinnamon, and then sprinkle it liberally over the top of the scone(s).
  3. Bake for 20-25 minutes, until the top is golden. Let it cool as long as you can stand it on a wire rack. You can certainly eat this warm from the oven, though.


Make the Glaze (optional):
  1. In a small bowl, mix the confectioners’ sugar, applesauce, and almond milk until well combined. You might need less almond milk if your applesauce is very wet, so go lightly. You don’t want it running completely off your scone(s). I like to make the glaze while the scones are baking so it has a chance to harden up a little.
  2. Drizzle the glaze over the top of the scone(s) as soon as it (they) are cool enough.


Variations:
  • You might toss some walnuts into the dough with the apples.
  • You might also toss some raisins into the dough with the apples. 


Thursday, November 27, 2014

Walnut and Apple-Stuffed Squash for One


With its herbed stuffing and warm squash, this apply treat is comfort food of the finest order. Savory apples? Why not!?!  

1 cup firmly packed diced whole-grain bread (you could substitute a grain, like rice or quinoa)
1 TBLSP olive oil
1/4 cup chopped red onion
½ large apple, peeled and diced
1 scallion, thinly sliced
1 TBLSP chopped fresh parsley
A pinch of dried thyme
2 leaves of fresh sage, thinly sliced
2 TBLSP finely chopped walnuts (or other nut)
Salt and freshly ground pepper, to taste
5 TBLSP apple juice
Half a squash, such as acorn, pumpkin, or butternut, cleaned of seeds, and with a nice open space to pile the stuffing

Preheat the oven to 375 degrees Fahrenheit.
  1. Place the squash half cut-side-down on a large baking sheet for 20 minutes. (With the bread, the squash will have roasted for about 30 minutes total before you stuff it.) 
  2. Toast the diced bread on the same large baking sheet in the oven by spreading it in a single layer and stirring occasionally, for about 10 minutes. 
  3. Meanwhile, in a skillet, heat the oil and sauté the onion over medium heat, until soft, about 5 minutes, maybe less. Add the diced apple and sauté for 5 more minutes.
  4. In a small bowl, combine the bread cubes, the onion and apple mixture, and the scallion, parsley, thyme, sage, walnuts, and salt and pepper. Once it’s well mixed, drizzle in the apple juice and mix to just moisten the mixture. You want to make sure that the bread is wet, for sure.
  5. Pull the squash out of the oven and turn it over. It should be starting to soften up a bit. Stuff the opening in the squash with the apple mixture and settle it on the baking sheet. If there’s any stuffing left over, put it into a nice ramekin. Of course, if you’re anti-squash, you could bake the whole batch in a small casserole.
  6. Bake for 30-45 minutes. When the stuffing is golden brown and still moist, and the squash is squishy when you poke it with a fork, it’s finished. You might need to add water to the bottom of the pan if the stuffing is cooking faster than the squash. The water will keep enough moisture in the oven for everything to turn out just fine. If you need to, cover the stuffing with a bit of foil so it won’t burn while the squash is finishing up cooking.


Variations:
  • Replace the bread with rice or another grain.
  • Bake the stuffing separately and roll seitan strips around blobs of it. Fasten the rolls with a toothpick and sauté in a little bit of oil.
  • If you can eat bell peppers (I can’t), it would probably be nice stuffed in there.
  • Wrap a piece of lavash or a burrito-sized tortilla around some of the cooked stuffing, add a little faux sour cream or cheese and some greenery and call it lunch.


Wednesday, November 26, 2014

Apple and Pumpkin Soup for One


The days are turning chilly and so for Day 4 of Apple Week, it’s time for some nice soup. Bake some crusty bread (like Garlic Buns for One or Fluffy Biscuit for One, or even Naan for One) and dine like the royalty you know you are.

Olive oil
Salt and pepper
½ a medium sugar pumpkin or butternut squash, de-seeded
½ of an apple
¼ of a medium yellow onion
1 TBLSP olive oil
Salt and pepper
1 clove of garlic
3-5 TBLSP almond milk (or the non-dairy milk of your preference)
¼ teaspoon freshly grated ginger
A pinch of ground cardamom
Salt to taste

Preheat the oven to 350 degrees Fahrenheit. Oil a baking sheet.
  1. Slather a little olive oil and salt and pepper on the cut side of the pumpkin or squash. Roast it cut-side-up on the prepared baking sheet for 20 minutes. Turn it on its tummy and roast for another 20-30 minutes, until the flesh is soft when you poke it with a fork. 
  2. While the squash roasts on its back, slice the apple and onion into wedges and arrange them on the same baking sheet when you flip the squash to its tummy. (So the apple and onion will roast for the last 20 minutes.) 
  3. For the last 10 minutes of roasting time, toss the garlic in there too. You can peel it later, if you want, but I like to peel it first.
  4. When they’re all cooked and cooled enough to handle, scrape the pumpkin or squash meat into a blender or food processor. Add the apple, onion, garlic (skinless, please), milk, ginger, cardamom, and salt. Puree until smooth. If it’s too thick, add water or more milk. I like mine fairly thick.
  5. Reheat it in a saucepan on the stove.


Variations:
  • Try it with coconut milk and coconut oil instead of the nut milk and olive oil.

Tuesday, November 25, 2014

Savory Apple Tart for One


It’s Day 3 of my Week of Apples, and it’s time for something savory. Savory apples? Sure! Apples are sweet and crunchy, and they play nicely with herbs, cheese, and onions.

For the Pastry:
¾ cup all-purpose flour
A pinch of salt
3 TBLSP vegan butter, cut into chunks
1 ½ TBLSP cold water (or part cold water, part vodka, which makes a lighter pastry)

For the Filling:
½ of a yellow onion, sliced
1 TBLSP olive oil
Pinch of sea salt
1 teaspoon dried rosemary leaves, chopped or ground in the mortar and pestle
1/2 tart apple (I like Grannysmith)
¼ cup walnut pieces
1 TBLSP of shredded vegan cheese (I used Daiya mozzarella)

To Make the Pastry:
  1. Combine the flour and salt in a small bowl. Add the butter and cut with a pastry knife or a fork until the dough is roughly the consistency of coarse meal.
  2. Add the water (and vodka), mixing until well combined.
  3. Gather it into a ball and wrap it in plastic wrap. Refrigerate while you make the filling, about half an hour.

Tra-la-la!

To Make the Filling:
  1. In a skillet, heat the olive oil, onions, salt, and rosemary, and cook over low heat for 20 minutes or so, stirring often. The onions should be soft and golden when they’re done.
  2. While the onions are cooking, prepare the apple. Peel it (optional), quarter it, and slice it thinly. When the onions are done, take them off the heat and add the apples and walnuts. Set it aside.
Preheat the oven to 375 degrees Fahrenheit.

Assemble the Tart:
  1. Roll the dough into a large circle. It doesn’t have to be pretty, but it should be about 1/8th inch thick. That’s not very thin—roughly like a sugar cookie. It will fit on a salad plate when you're finished.
  2. Lay the circle of dough on a baking sheet or in a pie pan. You’ll want to make sure that nothing drips into your oven, so your pan should have a lip.
  3. Leaving a 1-inch gap at the edges, spread the filling out over the dough. Sprinkle the cheese over the filling, and then bring that inch-wide dough-gap up and over the edges of the filling. This will be a very rustic looking tart. Unless you’re fastidious. I’m not. <shrugs> Sometimes, it looks a bit like a volcano. Other times, it’s more sophisticated.
  4. Bake for 40 minutes, until the pastry is golden.

Let it cool slightly before devouring.

Variations:
  • Diced vegan Beer Brats arevnice in the filling.
  • Rice or quinoa mix nicely with the filling too.
  • Try dried or fresh tarragon instead of rosemary for a slightly licorice taste. 


Monday, November 24, 2014

Fresh Apple Cake for One


This is a family favorite of my friend Rachel Craig. She begged and danced around and pled her case for months. So finally I veganized the recipe and cut it down to suit one ravenous consumer. (I did share it with her. I’m only a little mean around the edges.) But this is delicious, and I will make it again and again, whenever the cake craving hits.

For the Cake:
2 ½ teaspoons flax seed meal
1 TBLSP water
½ cup all-purpose flour, sifted
5 TBLSP plus one teaspoon granulated sugar
A pinch of salt
A pinch of baking soda
A shake of nutmeg
4 TBLSP canola oil
3 ½ TBLSP almond milk (or the non-dairy milk of your choice)
½ cup peeled, quartered, and thinly sliced apple (Grannysmith, or other tart apple)
2 ½ TBLSP chopped pecans

For the Frosting:
3 TBLSP vegan cream cheese, softened
4 teaspoons vegan butter, softened
A slosh of vanilla extract
½ cup confectioner’s sugar
3 TBLSP chopped pecans for decorating or putting into the frosting

Preheat the oven to 350 degrees Fahrenheit. Oil and flour two ramekins or two spaces in a muffin tin. I thought it would be fun to use a small loaf pans to get a rectangle shape. Experiment!

For the Cake:
  1.  Mix flax seed meal and water in a small bowl. It will get all viscous and gloppy while you’re preparing the other ingredients.
  2. In another small bowl, mix together the flour, sugar, salt, baking soda, and nutmeg. Add in the flax glop, and the oil, and milk. Mix it until it’s fairly smooth. It will be a thick and sticky batter.
  3. Add in the apples and pecans and stir until well combined.
  4. Pour the mixture into the prepared ramekins or pans.
  5. Bake for 35-40 minutes.
  6. When it’s cooled for 5 minutes, remove it from the pan and let it cool the rest of the way on a rack.

Let it cool completely. Tra-la-la! Don’t frost it early! Fiddle-dee-dee! You’ve got to wait until it’s cool! Hey-nonny-nonny!

For the Frosting:
  1. Combine the cream cheese and butter in a small bowl. Add the vanilla extract to make it a bit easier.
  2. Add the powdered sugar and stir enthusiastically until it’s frosting-textured.
  3. If you want to, add the pecans and combine, but not for too long. You don’t want to crumble the pecans too much. I like to put them on the outside instead, though.
  4. Refrigerate until the cake is completely cooled.

To Assemble the Cake:
  1. Once the cake is completely cooled, spread the frosting over the top of one cake. It will be bumpy. It’s a feature. Luxuriate in it. You might have to slice off the puffy tops of one or both cakes to make them nestle nicely. (As evidenced by the photos, I thought of this step AFTER I’d frosted them.)
  2. Place the other cake on top of the frosted one, and frost the sides and top.
  3. Decorate with pecan pieces, apple slices, or you could even leave it plain!


I am a terrible cake froster. There’s documented evidence of this fact. So I doubled the frosting recipe and was rather generous with it and put the pecans on the outside to make up for this horrible deficiency. 

Sunday, November 23, 2014

Apple-Cinnamon Waffle for One


You know the old adage “an apple a day keeps the doctor away?” Well, this recipe can keep the blues away too (unless you mean the music. This recipe cannot stop the music). It’s quick and easy and can make any morning feel like a celebration.

1 ½  teaspoon ground flaxseeds
1 ½ teaspoon water
5 TBLSP plus 1 teaspoon all-purpose flour
A pinch of baking powder
1 teaspoon agave nectar
4 ½ TBLSP non-dairy milk (I like almond milk)
2 teaspoons canola oil
1 teaspoon vegan butter (I like Earth Balance), room temperature
A dash of cinnamon
A slosh of vanilla extract
4 TBLSP grated, peeled apple (I like grannysmith, but use what you like), about ½ an apple
1 ½ TBLSP chopped walnuts (or the nut of your choice)
  1. In a small bowl, whip the flaxseeds and water until it’s frothy.
  2. In another bowl, a larger one, like a cereal bowl, mix together the flour, baking powder, agave, non-dairy milk, canola oil, vegan butter, cinnamon, vanilla extract, and the frothy flax seeds.
  3. Fold in the apple and nuts, and set the batter aside while the waffle-maker heats up.
  4. Lubricate your hot waffle iron—I use baking spray, but my mom used to grease the plates with oil after she washed them so they were already lubricated. I don’t use mine often enough to leave it lubed, but you do whatever suits you.
  5. Add the waffle mixture to the center of the hot waffle plate and spread it evenly around with the back of your mixing spoon. Close the waffle-iron and try to leave it closed until the light goes on again. I know it’s hard. But try to be patient. Once it has begun to cook, you can peek a bit without making a mess. It’s done when it’s golden brown.
  6. Serve with sliced apple, a sprinkle of ground ginger, and maple syrup. Yummy!


Variation:
  • Toss in some crystalized ginger that’s been all chopped up when you toss in the grated apple.
  • Use maple syrup instead of agave nectar.
  • Top with vegan cream cheese and orange marmalade, apple butter, fig jam, or your favorite preserves. 


Thursday, November 20, 2014

Fluffy Biscuits (or Hamburger Bun) for One


My mother gave me a James Beard Bread cookbook when I was eight or nine years old, and that’s how my love affair began. This recipe makes a very soft biscuit that’s a perfectly good hamburger or sandwich bun. But it’s a quick bread (no real rising time, no yeast), so it will be a bit crumbly, as any good biscuit should be.


Makes two fluffy biscuits or one hamburger bun

6 TBLSP all-purpose flour
Pinch of salt
¾ teaspoon sugar
1/2 teaspoon baking powder
1 ½ TBLSP vegan butter, cut into pieces
3 TBLSP non-dairy milk, plus a splash for the tops
Sesame seeds (for a hamburger bun)


Preheat your oven to 400 degrees Fahrenheit. For the best results make sure your ingredients are very cold. 

  1. In a small bowl, combine the flour, salt, sugar and baking powder.
  2. With a pastry cutter or fork, cut in the butter pieces until the flour has the texture of coarse grain.
  3. Pour the milk over the flour and stir gently with a fork or spoon until it comes together.
  4. Dump the dough onto a floured surface and knead it a few times until it's not super sticky anymore.
  5. Pat the dough gently to about an inch thick. Fold the dough over itself and pat it out to an inch thick again. Repeat twice more, so that in the end, you’ve folded it three times. Be very gentle! No pounding! Little baby pats!
  6. Fold the dough one more time, and pat the dough into a rectangle about ¾ of an inch thick. Cut it into two biscuits (with a knife) or leave it whole if you’re making a hamburger bun.
  7. Brush the biscuits with a daub of milk. I just splash a little into a small bowl and use my fingers. Sprinkle on the sesame seeds, if you’re using them.
  8. Bake for 15-17 minutes until the tops are golden.


This tasty meal was a Fluffy Biscuit with chunky mustard, Daiya faux cheese, Tofurkey Beer Brat, pickle, and lettuce.  

Monday, November 17, 2014

Carrot and Sweet Potato Soup for One


This simple little dish will make your kitchen smell marvelous and it will fill your tummy in the most satisfying way ever. And it’s orange. More food should be orange, don’t you agree?

½ TBLSP olive or coconut oil
1 clove garlic, minced
2-3 carrots, sliced
1 small sweet potato (about ½ cup), chopped into small cubes
1 dried apricot, diced
Dash of turmeric
Dash of ground cumin
Dash of ground ginger (or ½ inch of fresh, diced)
¼ cup water
Pinch of salt
Zest of ¼ orange (or dried)
1 ½ TBLSP orange juice (from the orange you just zested), about ¼ of an orange
1/3 cup almond milk (or other non-dairy milk—coconut would be lovely)
Ground black pepper to taste

  1. In a saucepan large enough to hold the whole serving, heat the oil and toss in the garlic.
  2. Add the carrots and sweet potato, dried apricots and spices. Toss them around in there for 3-5 minutes, softening the veggies a bit. Don’t burn the spices, though. Just brown ‘em. Your kitchen should smell fabulous.
  3. Add the water and salt, give it a stir, cover it, and let it simmer for 10 minutes. You’ll probably want to turn the heat down a bit, so you don’t boil all the water away. The object is to soften the veggies, but not turn them into mush. You should be able to push a wooden spoon through the veggies when they’re cooked to perfection.
  4. Add the zest, orange juice, and almond milk and simmer for 5 more minutes.
  5. Use an immersion blender or pour the soup into a blender or food processor and whirl until smooth.
  6. Top with ground black pepper and serve.


That yummy looking side dish is homemade naan topped with faux cream cheese, diced yellow onions, avocado, home-grown sprouts (alfalfa, mung, and broccoli), with a bit of chopped cilantro and some chopped raw almonds. It was yummy too. 

Thursday, November 13, 2014

Cauliflower Mac ‘n’ Cheeze for One


The weather is changing, and a nice piping hot bowl of something filling is all you can think about. But the refrigerator only has a little lingering cauliflower and the cupboard is nearly bare. What to do? Cauliflower Mac ‘n’ Cheeze, of course!

2.5 ounces dry macaroni pasta (for me, that’s about two double handfuls. Your hands may be bigger.)
½ a cup of cauliflower florets, broken up
1 garlic clove
2 ½ TBLSP almond milk, or the non-dairy milk of your choosing
2 TBLSP nutritional yeast
¼ lemon’s-worth of lemon juice
A splash of soy sauce
A pinch of kosher salt
A dash of turmeric
A smidgen of Dijon-style mustard
A grind or two of fresh ground pepper

  1. In a saucepan, boil the water for the pasta. You can salt it, if you like, but I don’t. The salt makes it take longer to boil, and there’s soy sauce and salt in the sauce. Once the water’s boiling add the pasta. Cook according the package directions and drain.
  2. Meanwhile, in another pan, steam the cauliflower for no more than 10 minutes. You want them just tender, not really cooked.
  3. In a blender, add the cooked cauliflower, the garlic, milk, yeast, juice, soy sauce, salt, turmeric, mustard, and pepper, and blend until it’s smooth and creamy.
  4. Add the sauce judiciously to the cooked pasta in your serving bowl. You might not want all of it, you, maybe you’re feeling like slopping it all up with a nice piece of crusty bread. It’s your choice.


Variations:
  • Chop some onions (I like green onions) to toss into the finished dish.
  • Add nuts, faux meat, tofu, or faux cheese to the finished product to add a protein element.
  • Parsley or cilantro would be nice, chopped finely and stirred into the finished sauce. Or you could grind it up with the sauce and have a greenish delight. 


Monday, November 10, 2014

Teriyaki Stir Fry for One


This recipe is more about the sauce than whatever you put it on, so have a little fun! I put it on noodles and roasted veggies, rice and steamed veggies, sushi—almost anything will do! It's also easily made gluten-free by putting it over a grain or using gluten-free noodles. 

You need to get the sauce made before you start your veggies ‘n’ stuff. If you’re cooking noodles or rice, you’ll need to do those in advance too.

1 TBLSP olive oil
1/8 head of cauliflower, cut bite-sized
2 slices red onion, diced,
2 mushrooms, halved and sliced
½ cup cooked soya noodles
Leftover roasted veggies (I had asparagus and sweet potato)
1 ½ TBLSP Thick Teriyaki Sauce (homemade, below, or you could use store-bought)

  1. In a large frying pan (I like non-stick), heat the olive oil and quickly sauté the cauliflower, mushrooms, and onion on high heat.
  2. When the cauliflower is starting to soften, add the prepared noodles.
  3. Then add the pre-roasted veggies and stir the whole thing up until it’s heated through.
  4. Place the steaming pile of yumminess in your serving bowl and then blop the teriyaki sauce on top of it. Stir at will, and devour.


Thick Teriyaki Sauce


Makes 1 cup, so plan to use this for dips, dressings, and delectifying your tofu.

½ cup tamari (or soy sauce)
¼ cup water
2 TBLSP mirin
5 teaspoons brown sugar
¼ cup granulated sugar
3 cloves garlic, put through the press (use only two cloves if you’re shy)
1 inch ginger, peeled chopped a little, and put through the garlic press
½ TBLSP cornstarch
1 TBLSP water

  1. Combine tamari, water, mirin, both sugars, garlic, and ginger in a saucepan. Heat it gently (medium heat will do) until the sugar is dissolved, about 5 minutes..
  2. Meanwhile, in a small bowl, combine the cornstarch and water until it’s thoroughly dissolved.
  3. Add the cornstarch slowly (a dribble at a time) to the sauce until it’s incorporated. ]
  4. Simmer until thickened, about 5 minutes. You’ll want to watch this, and stir it frequently. With all that sugar, it will be inclined to burn suddenly.

Variations:
  • Dip sushi in it.
  •  Put it over rice, noodles, tempeh, seitan, baked sweet potato—the possibilities are endless!
  • Put it over steamed veg, waffle-ironed tofu, and rice, and top it with furikake (a store-bought blend of seaweed, sesame seeds, and other yummies).

Thursday, November 6, 2014

Steamed Artichoke and Killer Sauce for One


There are a LOT of variations on suitable dips for artichokes, and this one is a variation on the one my mother used to make. I like the tang of horseradish root, but try Tobasco or Sriracha if a more straightforward bite suits you.

1 artichoke
2 slices of yellow onion, diced small
1 TBLSP capers, chopped, if you like
1 inch of fresh horseradish root, grated (substitute several shakes of Tobasco Sauce, if you prefer)
Garlic powder, to taste
A pinch of dried oregano
A pinch of dried basil
Salt and pepper to taste
Juice of ½ lemon
½ cup vegan mayonnaise
  1.  Cut the artichoke in half, or, if it’s huge, in quarters. Put it into a steamer in the bottom of a covered pot that’s half-filled with water. Bring to a boil. It should be done in 30 minutes to an hour, depending on how sturdy your artichoke is. Watch that the water doesn’t boil away!
  2. You know it’s done when you pull off a leaf, it comes away easily, and you can easily scrape the “meat” off with your front teeth.

Tra-la-la. While you’re waiting, make the dipping sauce.
  1. Put all the ingredients for the dip into a small bowl and stir enthusiastically. Let it rest in the refrigerator until the artichoke is finished.
If you’re unfamiliar with eating these delicacies, what you do is pry the leaves off of the cooked bulb one at a time. Dip the fleshy part that was attached to the bulb into the dip and then scrape the dip and the fleshy part off on your front teeth. When you’ve been peeling the leaves off for a while, you’ll notice that they change in character. When they’re super soft, you can eat them in a small bunch.

DON’T eat the hairy innermost part. It’s unpleasant to chew, but it will also do bad things in your tummy. The stem and the little cup that forms around the hairy part is the best of it though, so don’t get all hasty or frustrated with how much work it is to eat an actual thistle or you won’t really know what all the fuss is about.

Also, this particular vegetable is good for your liver, if you’re into treating your liver nicely. 


Monday, November 3, 2014

Lemon Vanilla Layer Cake for One


This little treat is fun enough to make you want to celebrate something! But if there’s no birthday or anniversary on the horizon, perhaps you can just celebrate the delights of a tangy but sweet little cake. Or Tuesday. Or that the sun came up. Or laundry day. 

For the Cake:
3 TBLSP of almond milk
A slosh of apple cider vinegar
2 TBLSP and ½ teaspoon granulated sugar
½ TBLSP coconut oil, melted (or canola oil)
A slosh of vanilla extract
6 TBLSP all-purpose flour
¾ teaspoon cornstarch
A pinch of baking powder
A pinch of baking soda
A pinch of salt
Zest of ½ lemon
Juice of ½ lemon (about 2 TBLSP)
For the Frosting:
3 TBLSP vegan butter
½ cup plus 1 TBLSP powdered sugar
A slosh of vanilla extract
Zest of ½ lemon
Juice of 1/4  lemon (about 1 TBLSP)
½ TBLSP almond milk, if more moisture is needed

To Make the Cake:
Preheat the oven to 350 degrees Fahrenheit. Grease and flour two ramekins or two spaces in a muffin tin. If you use a muffin tin, you may have some carving to do, or just an interestingly shaped cake.
  1. In a small bowl, whisk the almond milk and the apple cider vinegar together.It will look kind of disgusting as the two react to one another. You're making faux buttermilk. 
  2. Then stir in the sugar, oil, vanilla, flour, cornstarch, baking soda, baking powder, and salt. Make sure there are no lumps!
  3. Mix in the juice and zest. You’ll get a lovely frothy reaction. It should be a loose batter. If it’s too thick, add almond milk. If it’s too thin, add more flour.
  4. Pour the batter into the prepared pans.
  5. Bake for 20-25 minutes, or until a toothpick inserted into the middle comes out clean.
  6. Let the cakes cool completely on a rack before frosting.

Tra-la-la.

To Make the Frosting:
  1. In a small bowl, combine the butter, powdered sugar, and vanilla. Beat it together until it’s fluffy.
  2. Add the lemon zest and juice and continue to beat. If it's too stiff, add more lemon juice or a slosh of almond milk. Be careful, though. Too thick spreads better than too thin. (If you do go overboard, add more powdered sugar. But be careful! It can get way too sweet rather suddenly.) Set the finished frosting in the refrigerator to stiffen up a little. 
  3. When the cakes are completely cooled and out of the pans, frost the top of one and set it on your presentation dish.
  4. Then place the other on top of it and frost the top and sides of the whole shebang.
  5. Store it in the refrigerator until ready to eat.

Saturday, November 1, 2014

Sticky Buns for One


Some days, you want a little luxury with your coffee, especially the kind that reminds you happily of your childhood. Well, today’s that day! You can make these sweet little rolls the night before a dream cinnamon dreams, you can make them in time for breakfast or brunch, or they make a perfectly fine afternoon snack. No matter when you eat them, you’ll want to fit them into your day.

For the Dough:
3 TBLSP plus 1 teaspoon almond milk (or non-dairy milk of your choice)
1 teaspoon vegan butter
1 teaspoon rapid rise yeast (1/3 of the packet)
½ teaspoon granulated sugar
A pinch of salt
½ cup unbleached all-purpose flour (you might need a TBLSP or two more, so keep it handy)
Canola oil (for coating the rising bowl)
For the Sticky Glaze:
1 ½ TBLSP brown sugar
1 ½ TBLSP vegan butter
1 ½ TBLSP chopped pecans
For the Filling:
1 TBLSP vegan butter, melted
1 ½ TBLSP brown sugar
A sprinkle of cinnamon 

  1. In saucepan or the microwave, heat the milk and butter until it’s warm and melted. Don’t let it boil! Let it cool until you can stick your finger in it. If it’s too hot, you’ll kill the yeast, if it’s too cold, you won’t excite the yeast. It’s like Goldilocks.
  2. Sprinkle in the yeast. Let it activate for 10 minutes (it should be all bubbly if your yeast is healthy), and then add in the sugar and salt and give it a quick stir.
  3. Add in the flour and stir it until it starts to form a ball. Then place it on a lightly floured surface and knead it for a minute or so, until it forms a smooth ball. You might add more flour while you’re kneading, if it seems to need it. (See what I did there?) You want a soft ball, but not sticky anymore, and not as firm as bread dough.
  4. Clean out your mixing bowl and coat it with canola oil. Roll the dough ball around in the canola oil to coat the ball on all sides, and then cover with plastic wrap and set it in a warm place to rise for about an hour, or until doubled in size. If it’s a cold day, I like to turn the oven on for a few minutes, and then turn it off again, leaving the door open. I put the little dough ball right above that open door. Some people put the dough inside, but I find that I forget it’s in there…
  5. While the dough is rising, prepare the Sticky Glaze by mixing together the butter and brown sugar and spreading it in the bottom of two ramekins or two muffin tin spaces. Top with the pecan pieces and set the prepared pans aside.
  6. Once the dough has risen, roll it out into a thin rectangle on a lightly floured surface. Brush it with the Filling’s melted butter, and then top it first with brown sugar and then with the cinnamon.
  7. Roll the dough into a tight log. Cut the dough into 2-inch segments (there will be two of rolls) with a very sharp knife. Roll the segments into little snails. I like to put the seam on the inside of that roll, but it doesn’t matter very much.
  8. Snuggle the dough rolls into the Sticky Glaze in your prepared pan. I like to smoosh them a bit so that they fill the ramekin from side to side. Cover with plastic wrap and let it rise for 10 minutes.

Preheat the oven to 350 degrees. Tra-la-la.


  1. Bake the rolls for 25-30 minutes, until slightly golden brown. Let them cool for a few minutes, and then invert and devour.