Search This Blog

Thursday, May 26, 2016

Caramelized Onion Sushi with Balsamic Reduction for One


My neighbor was making something with onions and garlic and I found the smell overwhelming. What could I make when I so desperately needed to make a trip to the grocery store that I could see the back of the refrigerator? Of course. Sushi.
For the Sushi Rice:
1/3 cup sushi rice
21 cup water
1 teaspoon granulated sugar
2 TBLSP rice vinegar
For the Onions:
Slosh of olive oil
1 onion, sliced horizontally into rings
1 clove garlic, diced small
For the Balsamic Reduction:
¼ cup balsamic vinegar
1 TBLSP agave nectar (or maple syrup)
For Assembling the Sushi:
1 teaspoon wasabi powder
1 teaspoon water
2 nori sheets

Make the Rice:
  1. Put the rice and water in a pot on high. Once it begins to boil, turn the temperature down and cover the pot. Keep an eyeball on it, because it will bubble up and need to be stirred occasionally. Before taking it off the heat, be sure to taste it for doneness (about 15 minutes), and add more water if it needs more cooking time.
  2. In a tiny bowl, combine the sugar and vinegar. Stir until you can’t find the grains of sugar anymore.
  3. In a medium bowl, add the cooked rice and slosh the vinegar and sugar solution over it. With a rice paddle, in a swiping motion, mix the vinegar in and set the uncovered bowl aside to cool and absorb the liquid you just added.

Make the Onions:
  1. While the rice is cooking, get the onions started. Slosh the olive oil into a frying pan and put the onion rings in there with it. Cook on medium heat—you want this to go slowly so you get a lovely sweet flavor and a toasty brown color, so don’t rush this part. You have to wait for the rice anyway.
  2. After the onions have been cooking, stirring occasionally, for about 10 minutes, add in the garlic. You don’t want to put it in too soon or it will burn and be bitter.
  3. Keep sautéing, stirring frequently, for about 20 minutes, until the onions are very soft, dark brown, and extremely fragrant. Resist popping them immediately into your mouth and set them aside to cool. 

Make the Balsamic Reduction:
  1. In a small saucepan, combine the vinegar and agave.
  2. Heat gently (medium high), stirring very frequently, until the sauce is reduced by about half. There should be about 2 ½ TBLSP in there. It will bubble and look thin.
  3. Remove from the heat and let cool. It will thicken up a bit as it cools.
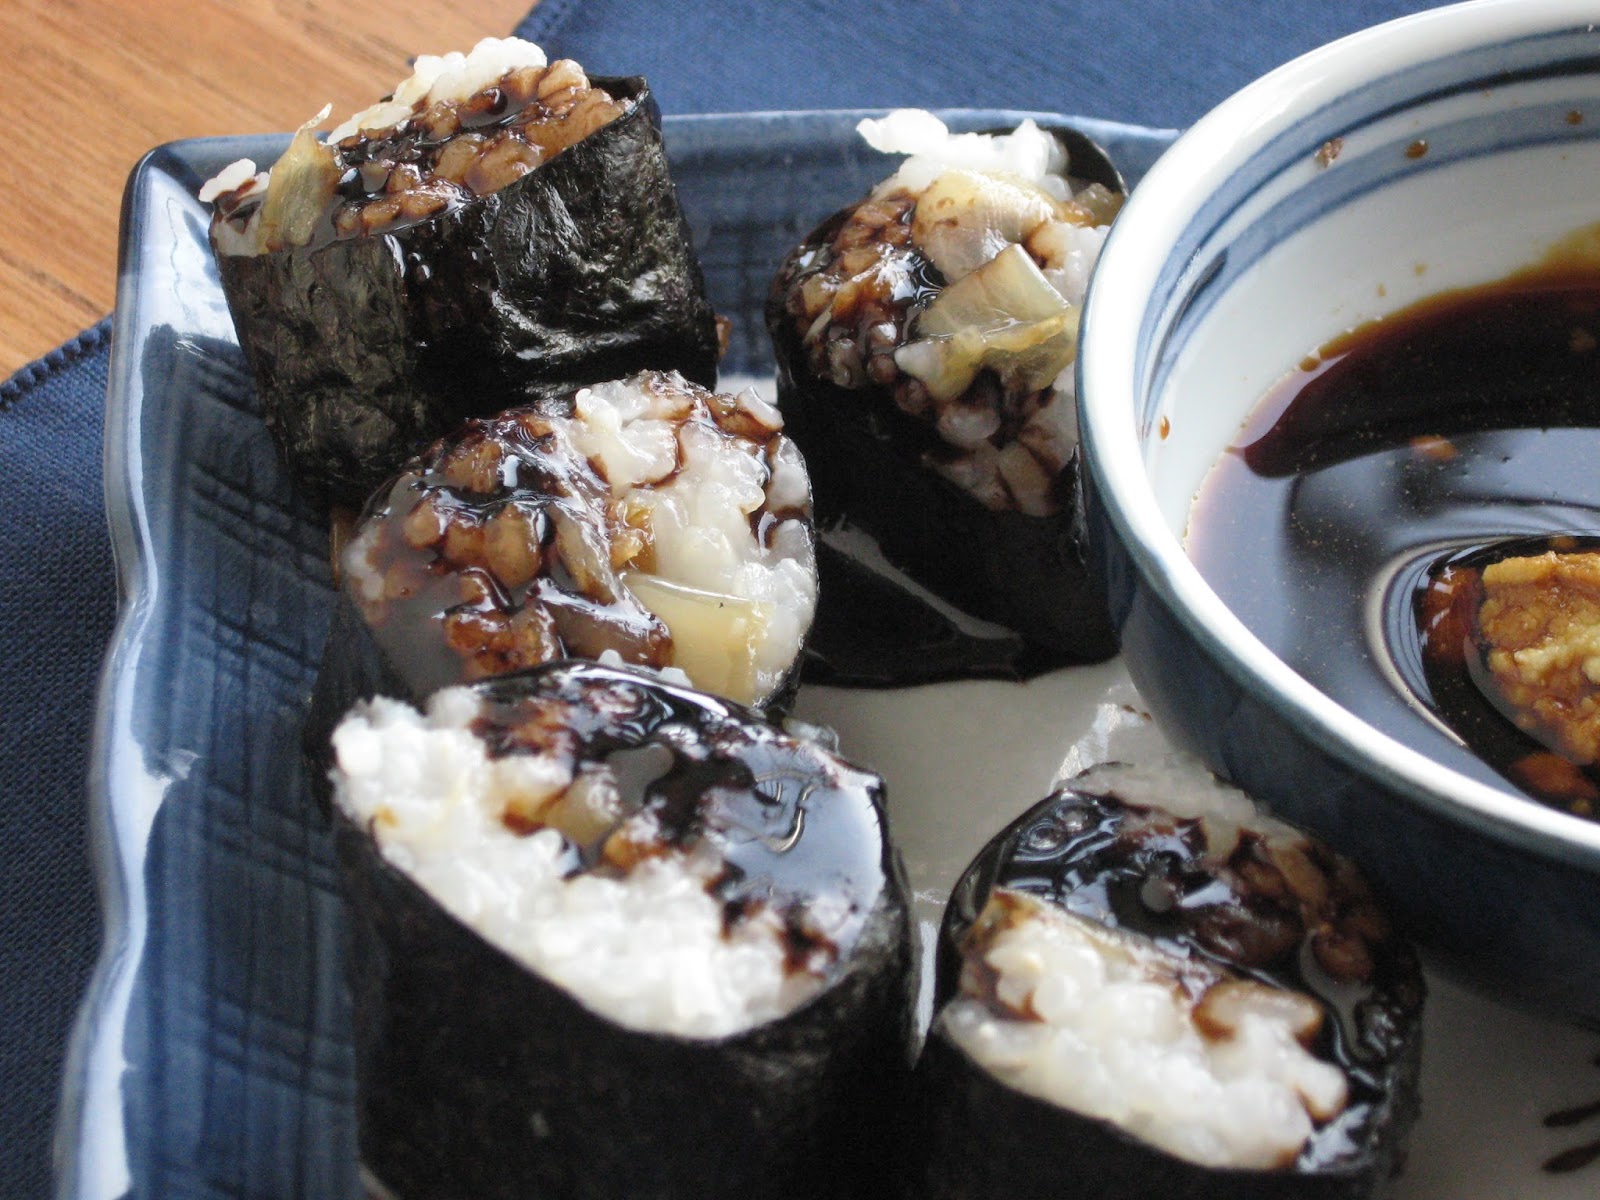
Assemble the Sushi:
  1. In a tiny bowl, combine the wasabi powder and water. Do it in equal parts, so if you like it strong, use more, if you like it weak use less. The important bit is that they be in equal parts and that it has some time to sit and thicken up.
  2. Either use a handy-dandy device to make the center portion of the sushi roll with a layer of rice, a layer of onions, and another layer of rice, or line it up on top of a nice piece of nori, all lined up and pretty on your rolling bamboo.
  3. Roll the little darling up, squeezing periodically to make it a tight roll, and then smear a little rice on the far end of the nori to act as glue.
  4. Place the roll in a piece of plastic wrap, and using a very sharp knife dipped in water, slice the roll into bite-sized pieces.
  5. Array the slices (sans plastic, please. It’s just there to hold the roll together while you slice) on your serving dish and swozzle the balsamic reduction over the top in an artful way.
  6. Combine the wasabi mixture with tamari or soy sauce.

Dip the little treasures into the wasabi and soy sauce and consume with the frenzy of piranha fish with a new visitor to the pond.
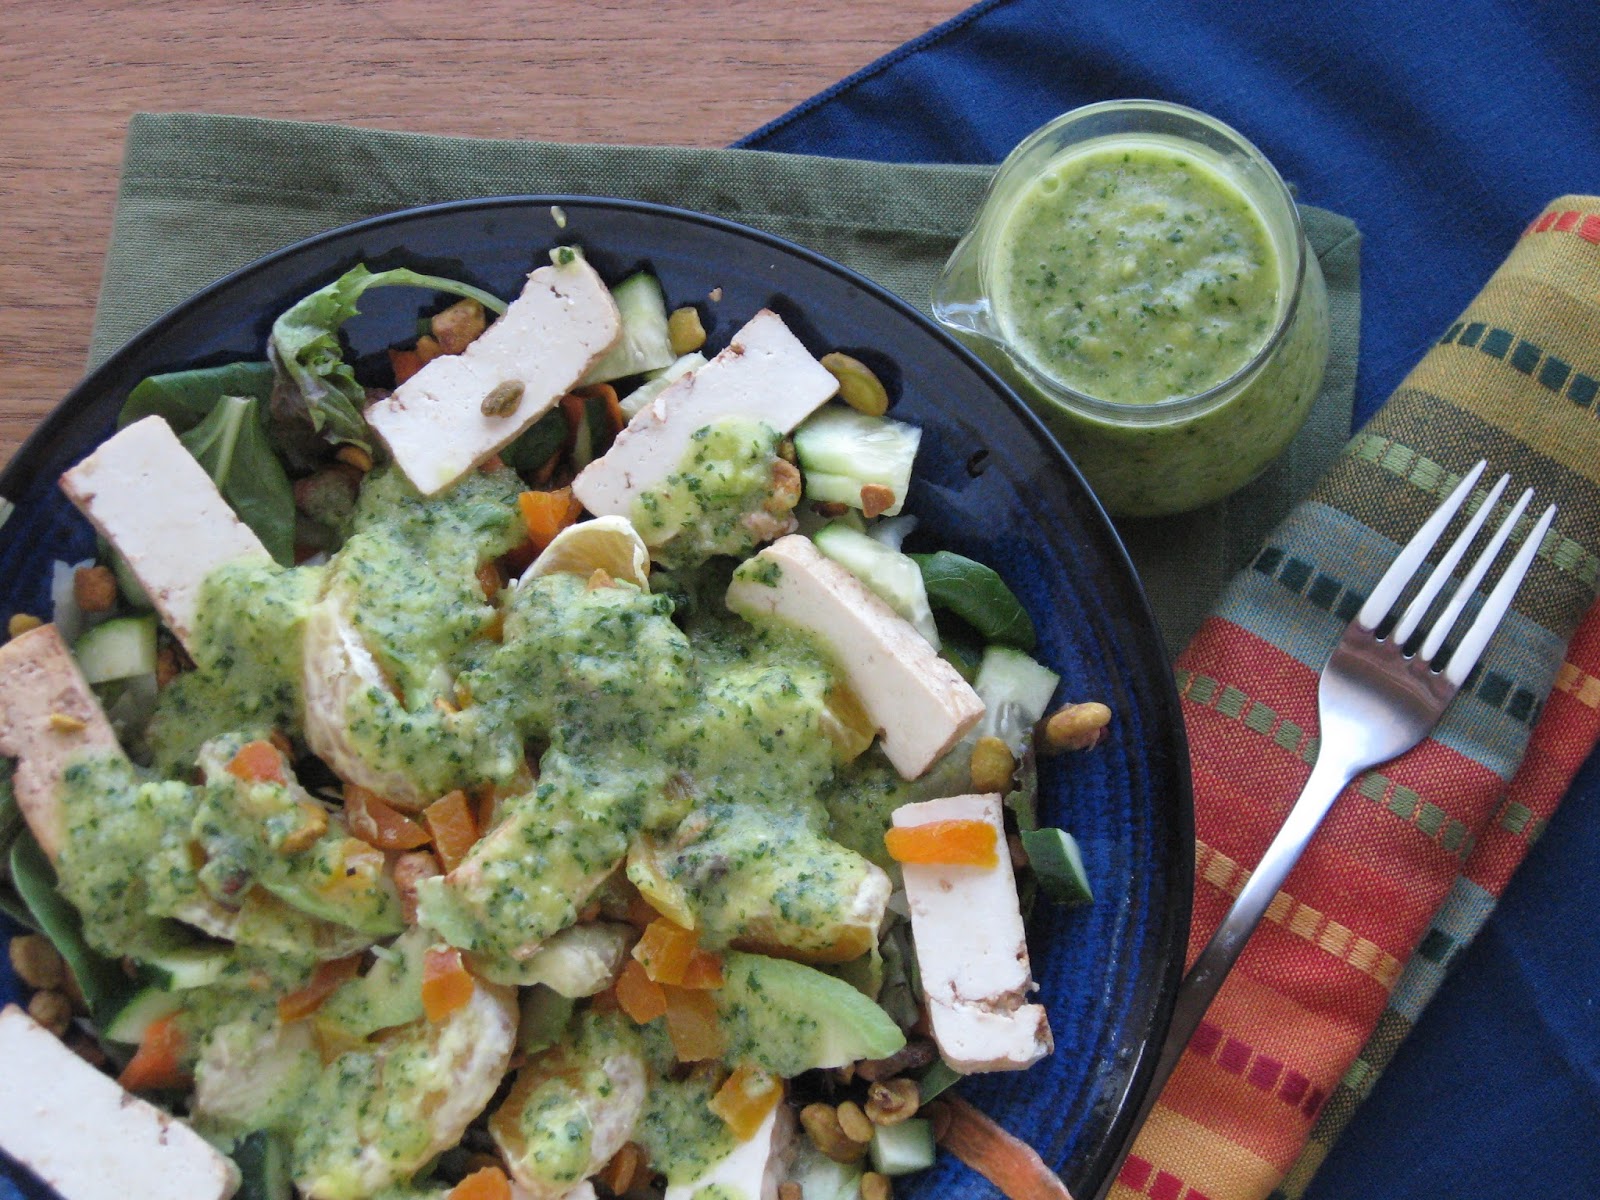
Variations:
  • Do an inside-out one, with rice on the outside as well as the usual inside to which you’ve added vegan cream cheese to the onions, drizzle with the balsamic reduction, and then top with a few pistachio nuts. (As seen in the photo below.) Oh boy!


Monday, May 23, 2016

Roasted Vegetables with Ranch Dressing for One


Sometimes, leftovers and scraps make the best meals. I’m usually not so lucky as to remember how I got to the place of yummy, but this time, it was simple. 

For the Veggies:
½ zucchini, sliced thinly
½ large sweet potato, sliced thinly
1/8 cauliflower, cut into florets
½ onion, sliced thinly and separated into rings
1 small ear of corn, kernels removed (or ¼ cup frozen)
1 clove garlic, diced tiny
Slosh (or two) of olive oil
Salt and pepper to taste
Noodles or rice to serve
For the Dressing:
2 TBLSP vegan mayonnaise
1 teaspoon vegan sour cream
Splash of tamari or soy sauce
Splash of apple cider vinegar
1 shake of onion powder
1 pinch of dried parsley
1 pinch of dried dill weed
1 pinch of dried oregano
1 pinch of dried tarragon
Salt and black pepper to taste

Make the Veggies:
Preheat oven to 350 degrees Fahrenheit.
  1. I use a mandolin to make the veggie slices somewhat uniform in size so they’ll roast evenly, but you do whatever works for you. Plop the veggies onto a baking dish. I use a cookie sheet and just corral the veggies toward the middle.
  2. Slosh some olive oil over the top of the veggies and toss some salt and pepper on there too. Give the whole pile a nice toss, so that the veggies are coated evenly with the oil and salt and pepper.
  3. Roast for 40-45 minutes, stirring the veggies up several times along the way. The veggies are done when the sweet potatoes are fork soft.

Meanwhile, get the noodles cooking. I used whole wheat in this image, but pretty much any noodle that makes you happy will work. Or rice. Any rice would do. Heck. Try millet, quinoa—any grain that pleases your palate.
Make the Dressing:
  1. Combine all the dressing ingredients in a small bowl with a whisk.
  2. Let it cool in the fridge until the other components are done. 

Assemble the Meal:
  1. Make a pile of the roasted (and amazing-smelling) veggies in the middle of your serving plate.
  2. When the noodles are cooked and drained, arrange them in a ring around the veggie pile.
  3. Spoon the dressing in a thin circle at the perimeter between the veggies and noodles, or just plop it on, whatever makes you happy.


Variations:
  • You can use just about any combination of veggies in this mix, whatever is in season or in the fridge. What’s interesting is to play with the seasoning—try Italian herbs, like oregano, basil, parsley, and rosemary (in a blend or on their own).
  • Adding nuts or tofu to the top would be good too. 


Thursday, May 19, 2016

Banana Muffins with Caramel Sauce for One


These muffins are great on their own, but if you peel off the wrapper and let them soak their dainty feet in some caramel sauce, you will think that the planets have aligned and all your troubles will fade to nothing.
4 teaspoons non-dairy milk (I like almond, but anything will do)
Slosh of apple cider vinegar
7 TBLSP whole wheat flour
Pinch baking powder
Pinch baking soda
Half an over-ripe banana, mashed
2 2/3 TBLSP granulated sugar
4 teaspoons vegetable oil
Several shakes of ground cinnamon
Several shakes of ground nutmeg
Pinch of salt
Slosh of vanilla extract
1 1/3 TBLSP chopped walnuts (optional)
1 1/3 TBLSP raisins (optional) OR skip the caramel and add chocolate chips

Preheat the oven to 325 degrees Fahrenheit.
  1. In a small bowl, combine the milk and vinegar and set aside to curdle. You’re making buttermilk.
  2. In a small bowl, combine the flour, baking powder, and baking soda.
  3. In another small bowl, mush together the banana, the curdled milk, sugar, vegetable oil, cinnamon, nutmeg, salt, and vanilla.
  4. Combine the dry and wet ingredients and mix until just barely incorporated. If it seems too wet (because of the banana), add more flour; if it’s too dry, slosh in a little milk. Add in the walnuts, chocolate chips or raisins, if desired.
  5. Line two muffin openings or ramekins with cupcake liners. Pour in the batter, filling it right to the top.
  6. Bake for 25-30 minutes, until a toothpick comes out clean.

While they’re baking, make the caramel sauce.
Caramel Sauce
¾ teaspoon brown sugar
1 TBLSP non-dairy creamer (use regular milk if you don’t have the thick stuff, and add a sprinkle of cornstarch or arrowroot to thicken it a bit)
1 teaspoon vegan butter, softened
Tiny splash of water
  1. Combine the brown sugar, cream (or milk and arrowroot), and the butter in a saucepan over medium-high heat. Bring it to a boil, and let it boil for 1 minute, until thickened.
  2. Remove from heat and stir in the splash of water.


Serve sloshed over your favorite pie, muffin, toast, or fresh-cut fruit, or make a puddle of it and settle your cake right down into it. Mmmm. 


Monday, May 16, 2016

Chocolate Cake with Peanut Butter Ganache for One


It’s birthday season, and I’m in the mood for cake. The hardest thing about making this cake is waiting for it to cool—other than that, it’s easy-peasy! (Yes, yes, I know. My frosting skills need a lot of work. But practice makes perfect, right? I’ll get there.)

For the Cake:
¼ cup wheat flour (or all purpose)
¼ cup all-purpose flour
2 TBLSP cocoa powder
1/3 teaspoon baking soda
¼ cup powdered sugar
Pinch salt
6 TBLSP non-dairy milk, divided
1 ½ TBLSP chocolate chips
1 TBLSP vegetable oil
Slosh of apple cider vinegar
Slosh of vanilla extract
2 ½ teaspoons maple syrup (or agave nectar)
For the Ganache:
2 TBLSP non-dairy milk
2-3 TBLSP powdered sugar
3 TBLSP chocolate chips
Slosh vanilla extract
1 TBLSP smooth peanut butter (almond or other nut or seed butter will do nicely too)
2 TBLSP apricot preserves (or raspberry, strawberry, cherry, etc.), divided

Make the Cake:
Preheat the oven to 350 degrees Fahrenheit. Grease or line two 5-inch cake pans (I use single-serving casserole dishes) with parchment.
  1. Place the flours, cocoa, baking soda, sugar, and salt in a small bowl and whisk it together to combine. 
  2. In another bowl, heat ¼ cup of the milk and the chocolate chips until just hot. You can use the microwave or a Bain Marie on the stove. Whisk until the chocolate is melted.
  3. Add the oil, vinegar, vanilla, and maple syrup to the chocolate and the remaining 2 TBLSP of milk, and mix until it’s smooth.
  4. Add the dry ingredients to the wet and mix until the batter is smooth. Divide the batter evenly between the two prepared cake pans.
  5. Bake for 30-34 minutes or until a toothpick inserted into the center comes out clean.
  6. Let the cakes cool in the pans for about 10 minutes, then remove from the pan and let cool on the rack completely. This may take a couple of hours. Cover with a towel if you’re worried about it drying out. You might try placing the cakes in the refrigerator for 15-20 minutes if you’re impatient.

Make the Ganache:
  1. In a small pan over medium heat, heat the milk and sugar until it’s hot through. Don’t let it boil, and stir constantly to prevent the sugar from burning.
  2. Add in the chocolate chips, and take the pan off the heat. Keep stirring until the chocolate is melted and smooth.
  3. Add in the vanilla and peanut butter. Mix until smooth.
  4. Let it rest in splendor in the refrigerator for 20-30 minutes, until it thickens to a spreadable consistency.

Festoon the Cake:
  1. Settle a cake plate on top of a mug or glass to get your little art project up high enough that you can see what you’re doing, and put one of the darling little cakes in the middle of it. You might want to slice off its little head, if it’s mounding up, so that the second layer will lie flat on it.
  2. Plop some of the ganache onto that cake and spread it over the top with an offset spatula or whatever tool suits you.
  3. Let that cake and its ganache rest in the freezer for 10 minutes. Don’t put the ganache back in the fridge, though, or it will get too hard to spread and you’ll have to v-e-r-y carefully reheat it on the stove. (Ask me how I know this.)
  4. Meanwhile, if you’re using the fruit preserves, heat it in the microwave or on the stove, just enough to make it thinner and more spreadable. About a minute in the microwave is plenty.
  5. Take that already-ganached cake out of the freezer and spread about half of the preserves delicately over the top of it. Don’t break the ganache!
  6. Settle the other, untouched cake on top of the preserves. Plop the rest of the ganache on that top cake and spread it smoothly over the top and down the sides. You might like the sides bare, in which case, you could freeze the cake for 10 minutes and then make a second top coat of ganache with whatever is left.
  7. Refrigerate (don’t freeze) the whole cake for 2 hours before serving. Decorate with fruit, mint leaves, chocolate curls—whatever suits you, or just scarf the whole naked cake down. It’s your cake to do with as you will!


Variation:
  • You can avoid the whole nut situation by using 1 TBLSP more of the chocolate chips in the ganache. You might need a little more powdered sugar to make it thick enough. You’ll have to experiment.
  • Use any sliced off cake top mounds to cheer up a bowl of ice cream. Or smear peanut butter on it and inhale it. 
  • Try smearing some heated (microwave) peanut butter on the first layer rather than fruit preserves. It's a simpler flavor profile, but oh, so yummy! 

Thursday, May 12, 2016

Pan-Fried Biscuit for One


This bready little meal is sugar free, can easily be made gluten free, and has infinite possibilities for variation. It's quick and delicious, too!

1 ½ TBLSP ground flax seed
2 TBLSP water or non-dairy milk
7 TBLSP all-purpose flour (or use gluten-free flour)
Sprinkle of cinnamon
½ teaspoon baking powder
3 TBLSP applesauce
Oil for frying
  1. In a small bowl, combine the flax meal and water (or non-dairy milk). Set it aside to form into a nice gloppy mess.
  2. In another small bowl (a cereal bowl works well for this), combine the flour, cinnamon, and baking powder. Stir in the applesauce and the flax glop. The batter will be thick, almost like dough. It will also be sticky, so you’ll have some trouble forming it into patties, but keep after it!
  3. Heat the oil in a frying pan over medium heat. Place the patties into the hot oil. When a peek at the underside shows golden brown, flip them over. Cover the pan for a few minutes to make sure they’re cooked inside.

Serve with fresh fruit and maple syrup.

Variations:
  • Toss in some chocolate chips. A tablespoon will do ya.
  • Toss in some blueberries. A quarter of a cup should be more than enough.
  • Serve with jam or marmalade instead of fresh fruit and syrup.
  • Grate some zucchini and add it with the applesauce.
  • Grate some carrot and add it with the applesauce.
  • Mash up some left-over roasted sweet potato and add it with the applesauce. 


Monday, May 9, 2016

Carrot Cake with Pineapple for One


I’m really not good at cake frosting. Let’s set that aside for a moment. This carrot cake is moist, unctuous, carroty, pineapply, and scrumptious to the last bite! Why don’t you make one, frost it nicely, and send me an image? It would be nice to see it done properly. It tastes the same, though, even when it’s not pretty.
For the Cake:
1 TBLSP ground flax seed meal
1 ½ TBLSP water
½ cup granulated sugar
5 ½ TBLSP vegetable oil
Slosh of vanilla extract
10 TBLSP all-purpose flour, divided
½ teaspoon ground cinnamon
½ teaspoon baking soda
Pinch kosher salt
¼ cup raisins
¼ cup chopped walnuts
1 cup carrots, grated and packed loosely
2 TBLSP diced fresh pineapple
For the Frosting:
3 ounces vegan cream cheese at room temperature
4 TBLSP unsalted vegan butter at room temperature
Slosh vanilla extract
1 cup confectioner’s sugar, sifted
For Decoration:
2 TBLSP diced fresh pineapple


Preheat the oven to 350 degrees Fahrenheit. Grease 2 5-inch cake pans. (I use single-serving casserole pans with great success.) Line them with parchment paper and then grease and flour the pans again.
Make the Cake:
  1. In a small bowl, combine the flax and water and set it aside to form a glop that you will use as an egg substitute.
  2. In another small bowl, beat the sugar and oil together until it’s homogenous, and then add the flax glop. Add the vanilla too, and mix it all well.
  3. In another small bowl, combine the flour, cinnamon, baking soda, and salt.
  4. Mix the dry ingredients into the wet. (You’ll re-use the dry bowl in the next step.)
  5. In a small bowl, combine the raisins and walnuts. Put a pinch of flour in there and toss them together. (This keeps the raisins and walnuts suspended nicely in the batter, rather than letting them sink to the bottom.) Add the carrots and pineapple.
  6. Add the carrot mixture to the batter and mix well. It will be hard to get the batter integrated with all those delicious carrots, but just keep after it.
  7. Divide the batter equally between the two pans.
  8. Bake for 50-55minutes, or until a toothpick comes out clean. It will be quite dark.
  9. Allow the cakes to cool completely in the pans on a wire rack. If it’s a warm day, you might consider sticking the little darlings in the refrigerator for a little bit.

Make the Frosting:
  1. In a small bowl, combine the cream cheese, butter, and vanilla. Add in the sugar and mix until the whole thing is pretty smooth.
  2. Let it rest in the refrigerator for 20 minutes to half an hour. It will spread better when it’s a little bit cold.

Festoon the Cake:
  1. Place one layer of cake on a serving dish. I like to elevate it on top of a mug to make it easier to frost, but you do what works best for you.
  2. With a knife or offset spatula, smear the top of that first layer with frosting. You don’t have to go quite to the edges and it will squish out a bit when you put on the second layer.
  3. Place the second layer neatly on top of the frosted first one. Spread the frosting on the top and sides of the cake. Decorate with diced pineapple.


Thursday, May 5, 2016

Savory Corn Fritters for One


These tasty treats made a satisfying breakfast, but they’d be just as good for lunch or dinner, or even broken up in a salad.
½ cup frozen corn, thawed
1 TBLSP finely chopped shallots (use green onions if you’re out of shallots)
Pinch dried chives
1 clove garlic, diced finely
1 TBLSP coriander or parsley leaves, chopped finely
2 TBLSP flour (I use all-purpose, but brown rice works just fine, too)
2 TBLSP corn meal
2 TBLSP water (more or less)
Freshly ground black pepper to taste
Salt to taste

  1. Combine all ingredients until you have a batter that’s loose, but firm enough to plop in a blob onto a hot skillet. It will be quite chunky.
  2. Heat a non-stick skillet on medium heat and spray it evenly with vegetable oil (or brush it with a thin layer of veggie oil).
  3. Drop enough fritter batter into the skillet to make a 3- or 4-inch fritter. It should be fairly thin, almost like a pancake, because you want it to cook through to the middle. Cook until the bottom is a golden brown and firm to the touch.
  4. Flip the little darlings over and cook the other side until golden.


Serve with savory sauce. I used left-over pineapple dressing in this image, but chutney, ranch dressingfig tapenade, banana ketchup—just about any savory sauce would be yummy. 

Monday, May 2, 2016

Pineapple Salad Dressing for One


This salad dressing is a little sweet, so when you’d really rather have dessert than a salad, you’ll find that you’ve straddled the line without breaking any rules!

¼ cup fresh pineapple chunks
3 sections of mandarin orange (clementines/tangerines)
½ TBLSP chopped fresh parsley or ½ teaspoon dried
½ TBLSP fresh lemon or lime juice
½ TBLSP agave nectar
¾ teaspoon vegetable oil (canola or something light)
Pinch salt
Pinch freshly ground black pepper 
  1. Whirl the ingredients together in a blender or food processor until they’re completely pureed.

If you don’t need all of it, it saves nicely in the fridge for a day or two.

It’s especially good over spinach salad, but it would be good over fried tofu, rice, or a lone halved avocado. The salad shown here is mixed lettuces, carrots, onions, orange slices, teriyaki tofu, avocado, diced dried apricots, and pistachios. Seen below is Savory Corn Fritters, coming soon!